

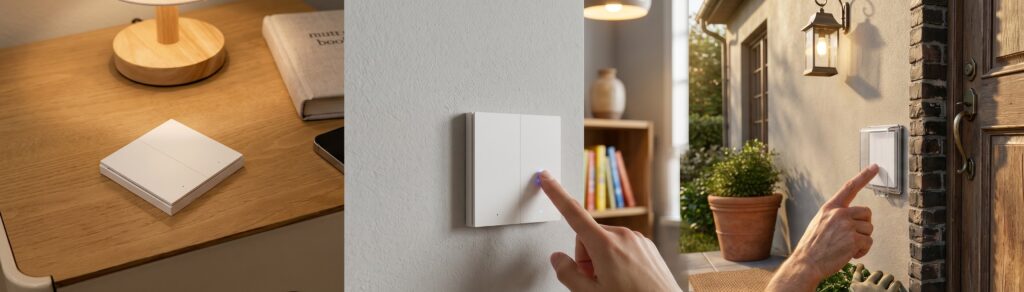
The Aqara Wall Switch H1 (no neutral, single rocker) has one feature that most wall-switch write-ups skip or get wrong: decoupled mode. Once you understand it, the switch stops being a dumb relay toggle and becomes a usable scene trigger — no Aqara Hub, no cloud, fully local.
This guide covers the QBKG38LM variant specifically. If you have the EU double-rocker (WS-EUK02), the pairing and configuration steps are essentially the same; I’ll note where things differ.
What you need before you start
- Home Assistant running (any install method — OS, Container, Core)
- Zigbee2MQTT installed with Mosquitto as the MQTT broker
- A Zigbee coordinator: SONOFF ZBDongle-P or ZBDongle-E work well; CC2530/CC2531 works but is aging out
- The Aqara Wall Switch H1 (QBKG38LM) physically installed
One pre-flight check worth doing before you pair anything: confirm your coordinator firmware meets the minimum versions for this device. For CC2530/CC2531 adapters the minimum is 20211115; for CC1352/CC2652 adapters (which covers the ZBDongle-P and ZBDongle-E) the minimum is 20211114. If you are below those versions, pair attempts will fail silently or the device will appear with missing entities. Upgrade the coordinator first.
The switch itself requires no Aqara Hub. It speaks Zigbee 3.0 directly to your coordinator. If you do already run an Aqara Hub M2 for HomeKit, the H1 doesn’t need to route through it — it pairs to your Zigbee2MQTT coordinator independently.
Pairing the switch to Zigbee2MQTT
Open the Zigbee2MQTT frontend and click Permit join (All). You have 254 seconds.
On the physical switch: hold the button for about five seconds until the LED indicator blinks rapidly. That’s pairing mode. If the LED blinks once and goes steady, you held too long and it reset. Try again with a shorter press.
Within a few seconds, Zigbee2MQTT should log a new device. The identifier that appears will be QBKG38LM with the internal model string lumi.switch.b1lc04. If you see a different model string, double-check whether you actually have a neutral-wire variant — the product line has several H1 SKUs that look similar in photos.
Once joined, click Disable permit join and rename the device to something sensible in the Z2M frontend (I use a room-based name like hall_switch_h1).
One pairing note: if you upgrade your Zigbee coordinator firmware after pairing, you may need to re-pair the switch. The device stores its network credentials tied to the coordinator’s IEEE address. Coordinator firmware upgrades sometimes reset that address.
What to do if pairing fails
First check the coordinator firmware version as above. Second, try pairing with the switch physically close to the coordinator — within a couple of meters, no walls in between. The switch is a Zigbee end device, not a router, so it doesn’t help extend your mesh; it needs a clean line to an existing router or coordinator during pairing.
If Z2M logs show the device joining but then immediately dropping, that is usually a coordinator firmware issue or an RF interference problem (2.4 GHz congestion from nearby Wi-Fi channels).
What Zigbee2MQTT exposes for this device
Once paired, navigate to the device’s Exposes tab in the Z2M frontend. You’ll see:
- switch — the main on/off entity (this is what HA sees as a
switchentity via MQTT discovery) - operation_mode — controls whether the physical button directly drives the relay, or acts as a scene trigger only
- action — the event entity that fires on button press (values:
single,double,hold) - power_outage_memory — whether the relay returns to its previous state after a power cut
- flip_indicator_light — inverts the LED indicator so it’s lit when the load is off (useful if the indicator faces you from across the room)
- led_disabled_night — dims the LED during nighttime hours
- device_temperature — the onboard sensor reporting switch temperature in Celsius
- countdown — a configurable off-timer (the relay turns off automatically after N seconds)
Home Assistant receives the switch entity automatically via MQTT discovery with no configuration needed on your end. The rest appear as separate entities in the device page.
Basic on/off control in Home Assistant
Once Z2M is running and discovery is enabled, open HA → Settings → Devices & Services → MQTT. The switch should be listed as a discovered device. If it isn’t, check that homeassistant: true is set in your configuration.yaml for Zigbee2MQTT (or the equivalent toggle in the Z2M frontend under Settings → Home Assistant integration).
The switch entity shows up under the device as something like switch.hall_switch_h1. From there it works like any other switch — add it to a Lovelace card, include it in scenes, use it in automations targeting the switch.turn_on or switch.turn_off service.
Test it by toggling from the Lovelace card and confirming the physical relay clicks. If the relay doesn’t respond but the Z2M state changes, check whether the physical switch is wired correctly and whether your load meets the minimum threshold (more on that below).
This is the same MQTT discovery workflow as other Zigbee2MQTT-paired Aqara devices. If you’ve already set up the Aqara Door and Window Sensor T1 or the Aqara Temperature and Humidity Sensor T1, nothing here should be new.
Decoupled mode: using the switch as a scene trigger
This is where most guides stop short, and it’s the source of most user frustration with this switch.
By default, the H1 operates in control_relay mode: physical button press → relay toggles → light turns on or off. Simple and obvious.
But if you have smart bulbs connected to that circuit — Zigbee or otherwise — you probably don’t want to cut power to them when someone presses the switch. Killing power to a smart bulb resets it to its default state (usually full brightness, warm white), and you lose HA’s ability to control it until it reconnects.
Decoupled mode solves this. In decoupled mode, the physical button press does nothing to the relay. Instead, it fires an action event in Zigbee2MQTT: single, double, or hold. Your HA automation catches that event and does whatever you want — turn on a scene, toggle a light group, run a script. The relay state is completely under software control.
Enabling decoupled mode
Option 1: Zigbee2MQTT frontend
Open the device’s Exposes tab. Find the operation_mode control. Change it from control_relay to decoupled. The change takes effect immediately; no restart required.
Option 2: MQTT publish
If you want to script this or trigger it from an automation, publish to the device’s set topic:
Topic: zigbee2mqtt/hall_switch_h1/set
Payload: {"operation_mode": "decoupled"}
Replace hall_switch_h1 with whatever you named the device in Z2M. To revert, publish {"operation_mode": "control_relay"}.
Automation YAML: single press triggers a scene, double press toggles a group
Here is a working example using the current Home Assistant automation syntax (plural triggers: / actions: keys, introduced in HA 2024.10 and the recommended form going forward). The triggers listen for action events from the switch via the MQTT device-trigger integration.
alias: "Hall switch H1 — button actions"
description: "Single press activates evening scene; double press toggles hall lights"
triggers:
  - platform: device
    domain: mqtt
    device_id: YOUR_DEVICE_ID
    type: action
    subtype: single
    id: single_press
  - platform: device
    domain: mqtt
    device_id: YOUR_DEVICE_ID
    type: action
    subtype: double
    id: double_press
actions:
  - choose:
      - conditions:
          - condition: trigger
            id: single_press
        sequence:
          - action: scene.turn_on
            target:
              entity_id: scene.hall_evening
      - conditions:
          - condition: trigger
            id: double_press
        sequence:
          - action: light.toggle
            target:
              entity_id: light.hall_group
mode: single
Replace YOUR_DEVICE_ID with the device ID shown in the HA device page (Settings → Devices & Services → MQTT → your switch → three-dot menu → Device info), and swap in your actual scene and light entity IDs.
The hold action works the same way — add a third trigger with subtype: hold and a corresponding action block.
One practical note: the device-based trigger requires the MQTT device to be discovered via the HA integration, so make sure the Zigbee2MQTT HA integration is enabled and the device appears in HA’s device registry. If you prefer a state-based trigger, you can also trigger on state changes of the sensor.hall_switch_h1_action entity — whichever is cleaner for your automation style.
The no-neutral minimum load problem
This is the most common source of complaints for the no-neutral H1 variant, and it is genuinely worth understanding before assuming the switch is defective.
No-neutral switches power their internal electronics by drawing a tiny current through the load circuit even when the relay is “off.” This works fine with incandescent or halogen bulbs, which have enough resistance to tolerate it. With LED bulbs — especially efficient modern ones rated at 3W or below — the leakage current can cause flickering, ghost switching, or unstable relay behavior.
The practical minimum load for the QBKG38LM is approximately 3W for incandescent and around 5W for LED, per Aqara’s own product FAQ. If your connected LED bulbs total less than that, you may see erratic behavior.
Your options:
- Use higher-wattage LED bulbs. A 5W or higher LED typically clears the threshold. Less efficient, but simple.
- Add a bypass capacitor in parallel with the load. A small capacitor (sometimes called an “LED bypass” or “anti-flicker” capacitor) wired across the lamp terminals provides the leakage path the switch needs without adding measurable power draw. Aqara sometimes includes a small bypass capacitor in the box with the switch; if yours did not, generic third-party bypass capacitors marketed for no-neutral smart switches will work. They are passive components and not Aqara-specific.
- Install a neutral wire adapter. If your wiring box has a neutral wire available at the switch location (even if the original switch did not use it), you can add a short jumper and use a neutral-wire variant of the H1 instead.
- Switch to decoupled mode and control smart bulbs directly. The relay stays permanently energized, so minimum load is no longer a factor. The bulbs are controlled by HA automations triggered by the button events. This is the cleanest long-term solution if you are going all-in on smart lighting.
Power-outage memory and other settings
power_outage_memory: When enabled, the relay returns to its previous on/off state after power is restored. Useful if someone in your household wants predictable behavior after a tripped breaker. When disabled, the relay defaults to off on power-up.
countdown: Sets an automatic off-timer in seconds. Send {"countdown": 300} via MQTT to turn the relay off after five minutes. Send 0 to disable. Useful for bathroom exhausts or garage lights you want to auto-off.
flip_indicator_light: The default LED behavior is “lit when relay is on.” Flipping this inverts that, so the indicator is lit when the load is off — a visual reminder that the switch is reachable. A matter of preference.
led_disabled_night: Turns off the LED indicator during nighttime hours as configured in the switch. Useful in bedrooms where a constant blue dot is unwelcome at 2am.
These settings all persist across power cycles once set. Changing them via the Z2M frontend or MQTT set commands is reliable.
OTA firmware updates via Zigbee2MQTT
The QBKG38LM supports over-the-air firmware updates through Zigbee2MQTT’s OTA mechanism. In the Z2M frontend, navigate to the device and check the OTA tab. If an update is available, it will be listed there.
OTA updates for Aqara devices come from the Zigbee2MQTT OTA index, which pulls from Aqara’s own firmware distribution. No cloud account is needed; Z2M handles the download and transfer locally.
One practical note: the OTA transfer is slow — Zigbee is a low-bandwidth protocol, and firmware images for switches can take 20–40 minutes to transfer. The switch remains functional during the update but may be briefly unresponsive at the moment of reboot. That is expected.
Frequently asked questions
Does the Aqara Wall Switch H1 (no neutral) work without an Aqara Hub?
Yes. The QBKG38LM pairs directly with any Zigbee2MQTT-compatible coordinator. No Aqara Hub is required. Cloud connectivity is also not required once paired — all communication is local via Zigbee.
What is decoupled mode and when should I use it?
Decoupled mode separates the physical button from the relay. The button still fires action events (single, double, hold) that can trigger HA automations, but it no longer directly controls the relay. Use decoupled mode when you have smart bulbs on the circuit and want HA to manage them, or when you want the button to control something other than the load it is wired to.
Why does my Aqara H1 no-neutral switch behave unreliably with LED bulbs?
The no-neutral design requires a minimum load (around 5W for LED per Aqara’s FAQ) to power its internal electronics. Low-wattage LED bulbs below that threshold leave the switch without a stable power path, causing flickering or erratic relay behavior. See the load section above for solutions.
Does the Aqara Wall Switch H1 extend my Zigbee mesh?
No. The no-neutral variant is a Zigbee end device, not a router. It does not relay traffic for other Zigbee devices. If you are building a large Zigbee mesh, you need mains-powered router devices (most smart plugs and bulbs function as routers).
How do I trigger a Home Assistant automation from an H1 button press?
Enable decoupled mode, then create an automation with a device trigger listening for action events (single, double, or hold) from the switch. The YAML example in the decoupled mode section above is a working template.
Once you have pairing and decoupled mode sorted, the H1 no-neutral is a capable local-first wall switch. The minimum load issue is real but not a dealbreaker — knowing about it in advance saves you an afternoon of troubleshooting. And with decoupled mode, the switch becomes something more useful than a simple relay: a physical input your automations can respond to however you want.