

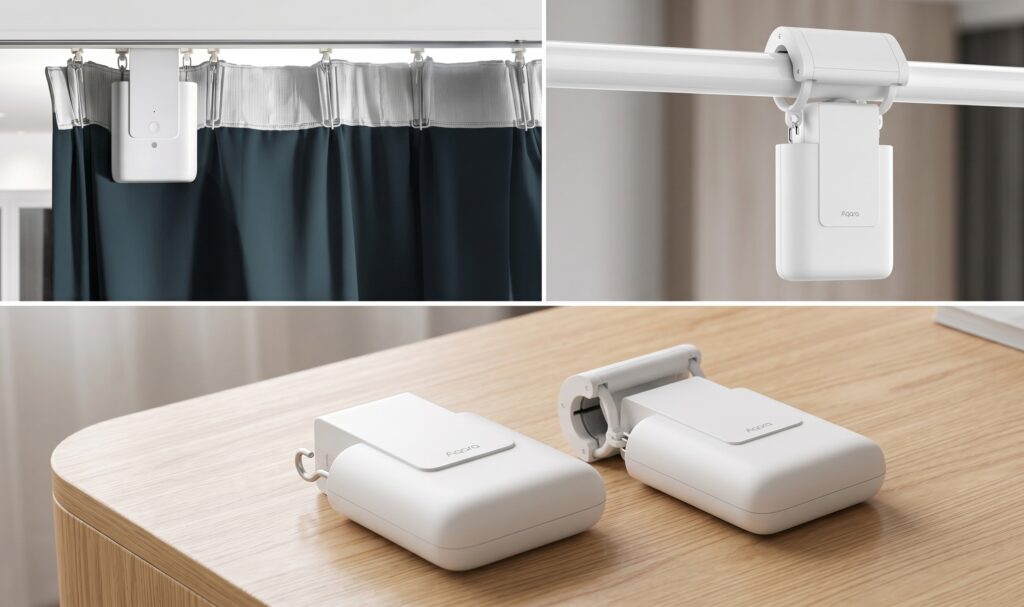
Aqara Curtain Driver E1 with Zigbee2MQTT and Home Assistant
The Aqara Curtain Driver E1 is genuinely useful hardware: quiet, rechargeable via USB-C, and small enough to mount without butchering your curtain rail. But the default setup path runs through the Aqara Home app and Aqara’s cloud. If you want local-only control through Home Assistant, you go through Zigbee2MQTT — and the docs are scattered enough that most people end up in a 1000-reply HA community thread trying to piece together what “calibration” actually means.
This guide covers pairing, mandatory calibration, all the entities you’ll see in HA, a few practical automations, and the failure modes worth knowing about before you hit them.
No Aqara Hub required. No cloud required.
What you need
Before starting:
- A Zigbee coordinator. USB sticks like the SONOFF Zigbee 3.0 Dongle-P or Dongle-E work well. The Aqara Hub M2 can also act as a Zigbee coordinator in some configurations, but the most common and reliable path is a dedicated USB stick running Z2M directly.
- Zigbee2MQTT running and connected to Home Assistant, either as an add-on (Home Assistant OS) or standalone via Docker.
- An Aqara Curtain Driver E1. The current rod-version model is the ZNCLBL01LM. Confirm your model number before troubleshooting anything.
- A compatible curtain rod or track. The driver clips onto the rod and runs along it. Physical installation is out of scope here; the Aqara product page has the mounting steps.
One important note: check your adapter firmware version before pairing. The ZNCLBL01LM requires CC2530/CC2531 adapters to be on firmware 20211115 or newer, and CC1352/CC2652 adapters on 20211114 or newer. Conbee II needs 0x26720700. Devices already paired to an adapter must be re-paired after a firmware upgrade.
Rod Version vs Track Version: which model number is yours?
Aqara sells the “Curtain Driver E1” in variants, and the naming gets confusing. The key distinction for Z2M purposes:
| Model | Zigbee ID | Notes |
|---|---|---|
| ZNCLBL01LM | lumi.curtain.acn003 / lumi.curtain.agl001 | Current E1 Rod Version — what this guide covers |
| ZNCLDJ12LM | lumi.curtain.hagl04 | Older B1 / Track Version — different Z2M page, some parameter differences |
The rod vs track distinction in Aqara’s own product naming refers to the type of rail the driver clips to, not to the Zigbee hardware inside. Both are end devices (not routers), but they have different firmware, different supported parameters in Z2M, and slightly different calibration behavior.
If you bought the current E1 Rod version from Amazon or AliExpress in 2023 or later, you almost certainly have a ZNCLBL01LM. If you have an older device or bought the track-mount variant, check the sticker on the device and compare against the Z2M device database.
The rest of this guide covers the ZNCLBL01LM.
Pairing the Curtain Driver E1 in Zigbee2MQTT
- Open the Z2M dashboard and enable permit join (either for your whole network or for a specific coordinator/router nearby).
- On the Curtain Driver E1, press and hold the reset button for approximately 5 seconds until the blue LED starts blinking. The reset button is a small pinhole button on the device body.
- The device should appear in Z2M within 30 to 60 seconds. It will show up as
lumi.curtain.acn003orlumi.curtain.agl001.
If the device does not join on the first attempt: the motor is a Zigbee end device (not a router), so it relies on nearby routers or the coordinator for signal. Try moving the device physically closer to the coordinator for the initial pair, or press the reset button periodically during the join window — this keeps the radio awake rather than letting the device sleep mid-pairing.
Once paired, disable permit join. The device will show a cover entity and several additional entities in Home Assistant — but it will not behave correctly until you run calibration. Do not skip the next section.
Mandatory calibration: why you must do this first
This is the part that trips up most people. Without calibration, the Curtain Driver E1 does not know where “open” and “closed” are. It will only report positions of 0% and 100%, and it will ignore any set-position command for intermediate values (like 50%). You’ll see the cover entity in HA, try to set it to 40%, and nothing will happen.
Calibration teaches the motor its travel limits. Once both limits are set, position reporting and intermediate commands work correctly.
Calibration via Z2M dashboard
The calibration process uses the limits_calibration parameter, which accepts three values: start, end, and reset.
The sequence:
- In the Z2M dashboard, find your curtain driver device and open the exposes panel.
- Send
limits_calibration: start. The motor will begin moving slowly in one direction to detect the first travel limit. - Let the motor run. It will stop automatically when it hits the physical end of travel (fully closed or fully open, depending on your installation orientation).
- Once the motor has stopped, send
limits_calibration: end. The motor now knows both limits and exits calibration mode.
After calibration, the cover entity should report intermediate positions correctly, and set-position commands should work.
If something goes wrong during calibration — the motor stopped early, the limits seem reversed, or position reporting is still broken — send limits_calibration: reset to clear the stored limits and start over.
What “inverted” calibration means
If your calibration results in the cover entity showing “open” when the curtain is physically closed (or vice versa), you need the invert_cover option. This reverses the open/close logic in Z2M (open=0 instead of open=100) without requiring recalibration.
Set invert_cover: true in the device options inside Z2M’s configuration.yaml for this device, then restart Z2M. You do not need to redo calibration after setting this option.
Note: the older ZNCLDJ12LM uses a reverse_direction parameter instead, and that one does require recalibration after the change. The ZNCLBL01LM uses invert_cover, per the Z2M device page.
Physical button calibration (no-app fallback)
If you prefer to set limits directly on the device without touching Z2M at all, there is a physical button method:
- Press the button on the device 5 times rapidly to reset any existing limits.
- Manually move the curtain to the fully closed position.
- Press the button 3 times to set the closed limit.
- Manually move the curtain to the fully open position.
- Press the button 3 times to set the open limit.
This is a useful fallback for initial setup or if the motor loses its calibration after a power event. The limits set this way are recognized by Z2M — you do not need to run the limits_calibration sequence afterward.
Entities you’ll see in Home Assistant
Once paired and calibrated, the device exposes more entities than you might expect. Here is what each one does. (Your actual entity IDs will reflect the device name you set in Z2M, so the examples below are illustrative.)
cover (main entity)
The standard HA cover entity: open, close, stop, and set position (0 to 100%). After calibration, set-position commands work accurately. Before calibration, only 0 and 100 are usable.
Position 0 = closed, 100 = open (assuming default orientation without invert_cover).
hand_open (toggle)
When enabled (default), the motor responds to manual curtain pulls. If you tug the curtain by hand, the motor assists rather than resisting, and fires manual_open or manual_close action events that automations can react to.
Disabling hand_open prevents the motor from responding to manual pulls. Useful in homes with children or pets where accidental tugs should not trigger the motor.
hooks_lock (lock entity)
This appears as a LOCK/UNLOCK entity in HA and confuses many users. It controls a physical locking hook mechanism present on certain track mounting configurations. If you are using the standard rod version (ZNCLBL01LM), you almost certainly do not have this physical mechanism on your hardware.
Safe to ignore or leave in default state. It is not related to the calibration lock or any software lock — it maps to a physical hook that either locks the curtain ring to the carriage or releases it.
illuminance (sensor)
The ZNCLBL01LM has a built-in lux sensor. It reports ambient light in lux, updated periodically. This is a read-only sensor; you cannot set it.
The practical value: you can trigger automations based on the light level at the window without deploying a separate light sensor in that room. “Close the curtains when lux exceeds 800” is a legitimate automation that does not need any additional hardware.
battery, charging, power_source
battery reports the current battery percentage. Note that battery percentage can lag by up to 24 hours after pairing or after a significant charge change — this is a known pattern on Aqara battery devices in Z2M, not a fault.
power_source reports whether the device is currently running on battery or a DC power source (USB-C mains adapter). charging is a binary sensor that reports whether the battery is actively charging.
If the device is plugged into a mains USB-C adapter, it reports dc_source. If running on battery, it reports battery. This matters for reliability: the motor can lose its calibration if the battery fully discharges. If you plan to run the motor on mains power permanently, the USB-C-to-mains adapter setup is worth considering for this reason alone.
action events
When hand_open is enabled and someone manually pulls the curtain, the device fires action events: manual_open or manual_close. These appear in the HA device’s events section and can be used as automation triggers.
Useful automations
The built-in illuminance sensor opens up automations that would otherwise require a separate sensor on the window. A few patterns worth setting up:
Open at sunrise using the lux sensor
Rather than triggering on a fixed sunrise time (which drifts through the year), trigger when the lux sensor crosses a “daylight” threshold:
automation:
  - alias: "Open curtains at dawn"
    trigger:
      - platform: numeric_state
        entity_id: sensor.curtain_driver_e1_illuminance
        above: 100
    condition:
      - condition: time
        after: "05:30:00"
        before: "09:00:00"
    action:
      - service: cover.open_cover
        target:
          entity_id: cover.curtain_driver_e1
Adjust the lux threshold (100 lux here) and the time window to match your window orientation and household schedule.
Close when direct sun hits the window
automation:
  - alias: "Close curtains on bright sun"
    trigger:
      - platform: numeric_state
        entity_id: sensor.curtain_driver_e1_illuminance
        above: 1000
        for:
          minutes: 5
    action:
      - service: cover.set_cover_position
        target:
          entity_id: cover.curtain_driver_e1
        data:
          position: 20
The for: minutes: 5 prevents a single cloud gap from snapping the curtains closed. Position 20 (nearly closed) rather than 0 lets some diffused light through while cutting direct glare.
Morning and evening schedule
A simple time-based schedule alongside the lux automations, useful as a fallback for overcast days when the lux sensor never triggers:
automation:
  - alias: "Morning open curtains"
    trigger:
      - platform: time
        at: "07:30:00"
    action:
      - service: cover.open_cover
        target:
          entity_id: cover.curtain_driver_e1

  - alias: "Evening close curtains"
    trigger:
      - platform: time
        at: "21:00:00"
    action:
      - service: cover.close_cover
        target:
          entity_id: cover.curtain_driver_e1
Entity IDs in these examples follow the typical Z2M-to-HA naming pattern; replace them with whatever your device shows in HA’s Developer Tools → States panel.
Common problems and fixes
Cover stuck at 0% or 100%, set-position commands ignored
Calibration has not been run, or was not completed successfully. Run the full limits_calibration: start → motor stops → limits_calibration: end sequence. If the motor stopped prematurely during a previous calibration attempt, send limits_calibration: reset first, then redo.
Position tracking wrong after a power cut
The motor’s position tracking can drift if it loses power mid-travel, or if the battery fully discharges. After restoring power, the device may no longer know where “open” and “closed” are.
Fix: run calibration again from scratch. Send limits_calibration: reset, then limits_calibration: start, let the motor run to its end, then limits_calibration: end. The physical button method also works here if you prefer not to use Z2M.
This is the most common post-installation failure mode. If you plan to leave the device on battery rather than mains USB-C, be aware that full discharge resets the calibration.
OTA update tips
Z2M supports OTA updates for the ZNCLBL01LM. There are reports of OTA failures in the Z2M issue tracker. Two things reduce the failure rate:
- Do not initiate an OTA update while the motor is running.
- Make sure the device is within solid Zigbee radio range during the update — OTA updates are long transactions and radio interruptions during the process can leave the firmware in a bad state.
If an OTA update fails, the device usually falls back to the previous firmware version. Wait for the device to recover fully before retrying.
ZHA users: limited support
The ZNCLBL01LM does not reliably pair with ZHA, particularly on the EZSP radio (used in Home Assistant Yellow’s built-in Zigbee module). Reports in the HA community confirm pairing failures and incomplete entity support.
Zigbee2MQTT is the reliable integration path for this device. If you are currently on ZHA and want this motor to work correctly, migrating to Z2M for this device specifically is the practical answer. The same Z2M-first pattern applies to other Aqara devices with patchy ZHA support, like the Aqara H1 wall switch (no neutral).
Does the Curtain Driver E1 extend your Zigbee mesh?
No. The ZNCLBL01LM is a Zigbee end device, not a router. It connects to the mesh but does not relay traffic for other devices. If you are deploying multiple curtain drivers across a larger home, make sure your mesh has enough router devices (mains-powered Zigbee devices that act as routers) to keep all of them within range.
The combination of local Zigbee control, a built-in lux sensor, and reliable position tracking after calibration makes this one of the more capable smart curtain solutions at its price point, without any cloud dependency once it is set up through Z2M. The calibration step is the only non-obvious part of the setup. Get that right on day one and the rest is straightforward.