

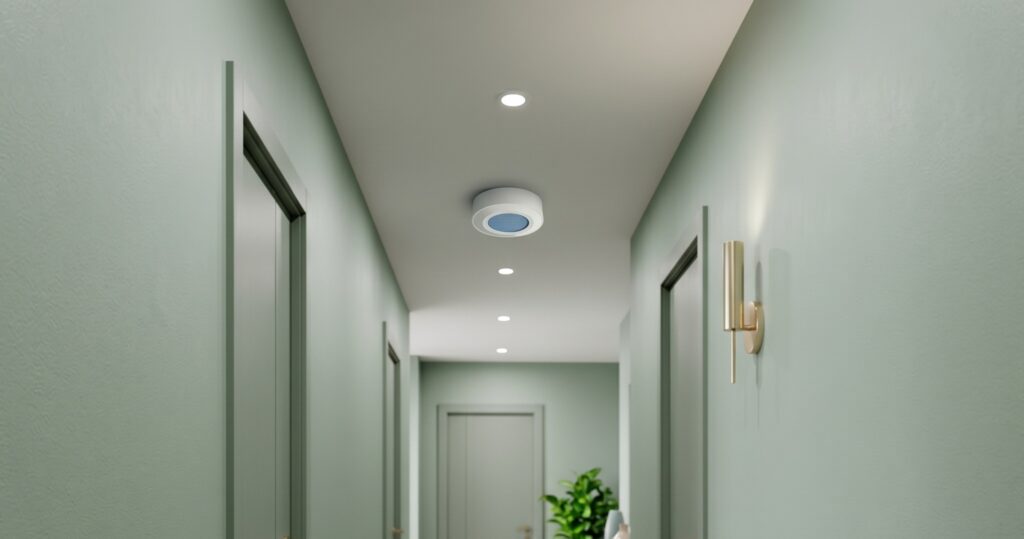
The Aqara RTCGQ13LM is the sensor people overlook in favor of the more popular P1 (RTCGQ14LM), usually because the P1 gets more search results and review coverage. But the RTCGQ13LM is a different device solving a different problem. If your use case involves pointed coverage, outdoor-adjacent placement, or a desk presence scenario, this is the one you actually want.
This guide covers pairing the RTCGQ13LM directly to Zigbee2MQTT, configuring the detection interval and sensitivity, and working around the known bugs that will trip you up if you’re unaware of them.
No Aqara hub. No Mi Home account. No cloud.
What the RTCGQ13LM is (and how it differs from the P1)
The RTCGQ13LM carries the “High Precision” name because of its narrower detection cone: approximately 60 degrees, versus the P1’s wide 170-degree spread. The range is 5 metres, shorter than the P1’s 7-metre coverage. Both are Zigbee 3.0 end devices on dual CR2450 batteries with a rated lifespan around six years.
For a deeper look at the P1 and how it compares on indoor wide-coverage use cases, see our separate P1 motion sensor setup guide.
The key differences in practice:
| Feature | RTCGQ13LM | P1 (RTCGQ14LM) |
|---|---|---|
| Detection angle | ~60° | 170° |
| Range | 5 m | 7 m |
| Illuminance sensor | No | Yes |
| IPX5 waterproof | Yes | No |
| Zigbee role | End device | End device |
That IPX5 rating matters. The RTCGQ13LM can go under an eave, in a covered outdoor area, or in a bathroom. The P1 cannot. The narrow cone also means you can aim it at a specific zone (a desk chair, a corridor choke point, a front door) without picking up movement from adjacent spaces.
What you lose compared to the P1: there is no illuminance sensor on the RTCGQ13LM. If you want a single sensor that handles both motion detection and light level for a “turn on lights when it’s dark and there’s motion” automation, the P1 is the better fit for indoor wide-coverage placement. The RTCGQ13LM needs a separate lux source for that logic.
What you need before pairing
- A Zigbee coordinator (CC2652P, CC2652R, Sonoff Zigbee 3.0 USB Dongle Plus, or equivalent)
- Zigbee2MQTT running and connected to an MQTT broker
- Home Assistant with the Zigbee2MQTT integration active
If you haven’t set up Zigbee2MQTT yet, start there before continuing. Our Zigbee2MQTT primer for Aqara and Xiaomi devices walks through coordinator selection and base configuration.
The RTCGQ13LM does not require an Aqara hub. It pairs directly to any compliant Zigbee coordinator. No Aqara account, no Mi Home app, no cloud dependency of any kind. The device communicates purely over Zigbee, and everything passes through your local MQTT broker.
The sensor does not act as a Zigbee router. It’s an end device only, so it won’t extend your mesh. Place your coordinator or a router device reasonably close, especially if you’re using this in a covered outdoor area where walls or building materials may attenuate the signal.
Pairing the RTCGQ13LM to Zigbee2MQTT
Step 1. In the Zigbee2MQTT frontend, go to Devices and click Permit join (All). Or permit join on a specific coordinator.
Step 2. On the sensor, press and hold the reset button for approximately five seconds until the blue LED blinks. The reset button is the small button on the side or back of the unit depending on revision.
Step 3. Watch the Z2M frontend or logs. The device should complete its interview within 30 to 60 seconds and appear as Aqara RTCGQ13LM with a complete entity list.
If pairing fails: let Z2M timeout, then try again. A long-press and retry usually works. If the sensor is new out of packaging and won’t pair, fresh CR2450 batteries sometimes make the difference. Low batteries can cause pairing failures even when the device appears to power on normally.
After a successful pair, rename the device in Z2M to something you’ll recognize in HA (e.g., motion_desk, motion_corridor_front).
Entities exposed after pairing:
– occupancy — binary, true/false
– motion_sensitivity — low / medium / high
– detection_interval — integer, 2–65535 seconds
– device_temperature — chip temperature (not room temperature; diagnostic only)
– battery — percentage
– voltage — millivolts
– power_outage_count
Configuring detection interval and motion sensitivity
What detection_interval does
After the sensor detects motion and sends occupancy: true, it starts a timer. If no further motion is detected before the timer expires, it sends occupancy: false. The detection_interval value is that timer, in seconds.
The minimum is 2 seconds, the maximum is 65535 seconds (roughly 18 hours). The Zigbee2MQTT device page does not publish a definitive factory-default value, so check the value the device reports immediately after pairing on the device’s Exposes tab, then tune for your use case.
For a bathroom presence setup where you want the light to stay on while someone’s in there, a shorter interval with motion sensitivity on high gives you responsive re-arming. For a desk presence setup, a longer interval (say, 300 to 600 seconds) accounts for periods of stillness without triggering a “nobody home” false negative.
Common starting points:
| Use case | Sensitivity | detection_interval |
|---|---|---|
| Desk / workstation presence | High | 300–600 s |
| Corridor or entryway | Medium | 30–60 s |
| Bathroom (occupied) | High | 120–180 s |
| Outdoor covered area, security | Low | 5–15 s |
What motion_sensitivity does
- High: detects subtle, low-amplitude movement, such as someone sitting still at a desk, using a phone, or reading. Use this when you need to detect occupancy even when the person is not moving much.
- Medium: default for general room coverage. Catches normal movement, filters out very minor vibration.
- Low: minimizes false positives. Suited for security-alarm use cases where you only want to trigger on clear, deliberate movement.
How to set configuration via MQTT
You can write these values from the Z2M frontend or via MQTT directly.
From Z2M frontend: Go to the device, find the Exposes tab, and use the slider or input for detection_interval and the dropdown for motion_sensitivity. Click set.
Via MQTT:
Topic: zigbee2mqtt/<device_name>/set
Payload: {"detection_interval": 120}
Topic: zigbee2mqtt/<device_name>/set
Payload: {"motion_sensitivity": "high"}
Important caveat: press the reset button before writing config.
The RTCGQ13LM is a sleeping device. Between detections, it sits in a low-power state and does not listen for incoming MQTT messages. If you send a set payload while the device is asleep, the message may be queued in Z2M but won’t be applied until the device wakes up, which could be a long time if no motion is occurring.
The reliable workaround: press the reset button on the sensor immediately before sending the configuration payload. The button press wakes the device momentarily, opening a short window where it will receive and apply the write. This is a power-saving behavior, not a bug. The Aqara Home app avoids this limitation because it maintains a persistent connection protocol with the hub; Zigbee2MQTT does not have an equivalent path for sleeping end devices.
After setting, verify by reading back the state on the Z2M device page or subscribing to the state topic.
Known issues
Z2M 1.24.0: occupancy_timeout renamed to detection_interval
In Z2M 1.24.0, a configuration parameter was renamed from occupancy_timeout to detection_interval. This wasn’t a cosmetic alias. Users upgrading from Z2M 1.22.x found the sensor was incorrectly resetting occupancy to false during continuous motion, requiring someone to physically leave and re-enter the detection zone to re-trigger. The rename caused the interval logic to misfire during the transition. (GitHub issue #11843.)
If you’re running a Z2M version in the 1.24.x range and experiencing ghost “unoccupied” events despite confirmed presence, check whether your stored configuration is still referencing occupancy_timeout. Remove it, re-apply with detection_interval, and verify behavior.
Firmware 20211114: occupancy false events stop sending
A separate issue (GitHub issue #10471): after updating the coordinator firmware to version 20211114 (CC2652P) or 20211115 (CC2531), some users found the RTCGQ13LM would send occupancy: true correctly but never send occupancy: false. The sensor effectively got stuck in a “detected” state.
A converter fix was merged, and the standard resolution is to re-pair the device after the coordinator firmware update. If you’ve recently updated your coordinator firmware and your RTCGQ13LM automations have stopped clearing correctly, re-pair first before investigating further.
ZHA support remains unreliable
Early reports from 2021 to 2022 document the RTCGQ13LM not being recognized correctly under ZHA with deCONZ/ConBee II, with motion detection and battery reporting both failing. ZHA support has improved somewhat since then, but reliability issues persist: Home Assistant core issue #114129 documents the RTCGQ13LM falsely triggering on ZHA for about 3 seconds every hour. If you’re setting up this device fresh, use Zigbee2MQTT.
Building a basic automation
Here’s a minimal Home Assistant automation that turns a light on when motion is detected and turns it off after occupancy clears. The YAML below is illustrative and has not been tested end-to-end on our bench, but it follows the standard Z2M binary_sensor pattern.
alias: "Desk light — motion on/off"
description: ""
trigger:
  - platform: state
    entity_id: binary_sensor.motion_desk_occupancy
    to: "on"
    id: motion_detected
  - platform: state
    entity_id: binary_sensor.motion_desk_occupancy
    to: "off"
    id: motion_cleared
condition: []
action:
  - choose:
      - conditions:
          - condition: trigger
            id: motion_detected
        sequence:
          - service: light.turn_on
            target:
              entity_id: light.desk_lamp
      - conditions:
          - condition: trigger
            id: motion_cleared
        sequence:
          - service: light.turn_off
            target:
              entity_id: light.desk_lamp
mode: single
This relies on the sensor’s own detection_interval to determine how long after the last motion event before occupancy clears to off. There’s no separate HA-side timer needed unless you want to override the sensor’s interval. The benefit of letting the sensor handle the delay: the logic is simple and the automation stays stateless.
If you want a HA-side override, for example to keep a light on for 10 minutes regardless of the sensor interval, use wait_for_trigger with a timeout or an input_number helper to control the delay independently. That’s more flexible but also more state to manage.
Replace binary_sensor.motion_desk_occupancy with your actual entity name from the Z2M integration.
Local operation and privacy
The RTCGQ13LM is a Zigbee-only device. It does not have a Wi-Fi radio. It cannot communicate with Aqara’s servers, and it does not require any Aqara account to function. Once paired to your Zigbee2MQTT coordinator, all data stays within your local network.
No Aqara account. No Mi Home app. No cloud pairing step.
The device_temperature entity is worth clarifying: it reflects the onboard chip temperature, not the ambient room temperature. Don’t wire it into HVAC automations expecting room-level readings. It’s a diagnostic value, useful mainly to confirm the device is alive and reporting.
OTA firmware updates are supported for this device through Zigbee2MQTT, so you can apply manufacturer firmware updates when they’re available without physical access or the Aqara app. Check the Z2M OTA page or the device’s Exposes tab for pending updates.
If you’re already running other Aqara devices through Z2M, this sensor fits into the same setup without any additional configuration. For coordinator-side considerations and a worked example using the M2 hub in Zigbee-bridge mode, see our Aqara Hub M2 local setup guide.
The RTCGQ13LM earns its place when you need precision over breadth. The narrow cone, the IPX5 rating, and the configurable sensitivity give you options the P1 doesn’t. Just go in knowing the config-write caveat, check your Z2M version if you’re upgrading from 1.22.x, and re-pair after any coordinator firmware update.