

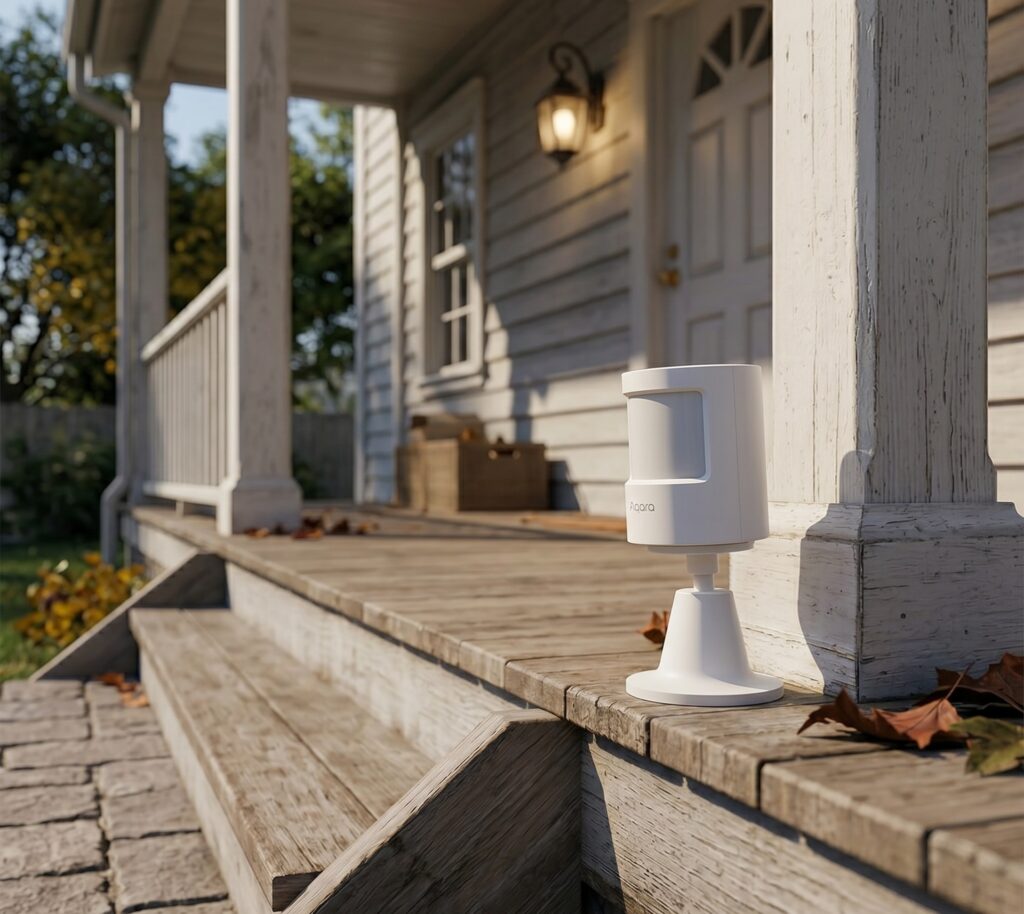
The Aqara P1 (RTCGQ14LM, also sold as MS-S02) lets you adjust motion sensitivity and the interval between reports in Zigbee2MQTT. It runs on two CR2450 batteries and reports movement and illuminance to Home Assistant through your Zigbee coordinator. An Aqara hub or account is unnecessary for this route.
There is one setting worth understanding before you build a lighting automation: the sensor’s detection interval and the time Home Assistant keeps the lights on are different things. Increasing the interval makes the sensor report less often; it does not turn a PIR motion sensor into a detector for someone sitting still.
This guide covers pairing, the current exposed settings, lux readings, LED control, lighting and away-mode alerts, and the checks to make when a sensor drops off your mesh.
Disclosure: Some links in this article may be affiliate links. We may earn a small commission at no extra cost to you.
Why the P1 over the RTCGQ11LM
The P1’s main advantage over the older RTCGQ11LM is configuration. The older sensor has an approximately one-minute interval between motion reports. The P1 lets you change that interval and its sensitivity over Zigbee. Both models have light sensing, so illuminance alone is not a reason to replace the older one.
| Feature | RTCGQ11LM | RTCGQ14LM / P1 |
|---|---|---|
| Interval between motion reports | Approximately 60 seconds in normal operation | Zigbee2MQTT exposes 2–65,535 seconds |
| Light sensing | Yes | Yes; reported as illuminance in current Zigbee2MQTT |
| Sensitivity setting | No equivalent setting in its Z2M exposes | low, medium, high |
| Motion indicator setting | No equivalent setting in its Z2M exposes | trigger_indicator can be switched off |
| Battery arrangement | One CR2450 | Two CR2450 |
| Advertised battery life | Up to two years | Up to five years under Aqara’s stated conditions |
Aqara’s five-year P1 figure assumes the motion LED is disabled and the detection timeout is at least 30 seconds. Installation, traffic and battery condition will affect the result. The official P1 comparison and battery-life footnote explain those conditions; the larger Z2M interval range is an integration setting, rather than the 1–200-second range advertised for Aqara Home.
If your RTCGQ11LM already works well, keep it. A P1 gives you more control over frequent movement reports, but a long light-off delay or a presence sensor may be the better fix for a room where people spend most of their time seated.
What you need
- A working Home Assistant installation, an MQTT broker and Zigbee2MQTT connected to that broker.
- A supported Zigbee coordinator. A CC2652-based USB adapter or an Ethernet coordinator such as the SLZB-06 can serve this role; check Z2M’s supported-adapter list and the firmware requirements for your adapter.
- An Aqara P1 with its battery isolation material removed and both CR2450 cells correctly installed.
- MQTT discovery enabled in Zigbee2MQTT and the MQTT integration configured in Home Assistant.
The P1 device page lists minimum firmware for older adapters. Check this if an otherwise healthy network cannot interview the P1. Use a supported current Zigbee2MQTT installation instead of treating an old version number as a guarantee of compatibility.
Pairing the P1
- Open Permit join in the Zigbee2MQTT frontend.
- Hold the P1’s reset button for about five seconds, until the blue light blinks.
- Watch the Z2M log for the join and completed interview. If it joins but stops responding during the interview, try a short button press to wake it.
- Give the sensor a friendly name, such as
living_room_p1, and close Permit join after the interview finishes. - Check the occupancy entity in Home Assistant by walking through the sensor’s field of view. Then test it in its intended position before fixing the mount permanently.
If the usual sequence fails, the Z2M device notes suggest an alternative: hold the button until the light flashes, then immediately enable joining through the nearest router or coordinator. That is a troubleshooting option, not a rule that joining must always be opened afterwards. Also check battery contact and try pairing near the intended parent device.
Keep a USB coordinator away from USB 3 devices and your Wi-Fi access point using an extension cable. Zigbee and Wi-Fi share the 2.4 GHz band; check the channel plan before blaming the P1. Changing a working Zigbee network’s channel can affect every device, so avoid using that as the first pairing fix.
Entities Zigbee2MQTT exposes
| Z2M property | Use in Home Assistant | What to expect |
|---|---|---|
occupancy |
Motion binary sensor | Motion reports set it to true; Z2M clears it after its timeout |
illuminance |
Light-level sensor in lux | A sample accompanying a motion report, not a continuously refreshed light meter |
battery |
Battery percentage sensor | A report can take up to 24 hours to arrive |
voltage |
Battery voltage in mV | Useful alongside the percentage reading |
device_temperature |
Diagnostic temperature | Internal device temperature, not a substitute for a room thermometer |
motion_sensitivity, detection_interval, trigger_indicator |
Configuration controls | Wake the P1 before writing a change |
Entity IDs depend on your names and discovery history. An older installation may still use an ID ending in illuminance_lux; the current MQTT property is illuminance. Find the actual IDs under the device in Home Assistant before copying an automation. Do not expect a separate battery_low property from this model’s current Z2M exposes.
Tuning sensitivity and timeout in Home Assistant
Open the P1’s Exposes panel in Zigbee2MQTT. Immediately before changing sensitivity, detection interval or the motion indicator, briefly press the pairing button to wake the sensor. Apply one setting and confirm the reported value before moving on. These are device writes; restarting Home Assistant does not apply them.
motion_sensitivitycontrols triggering distance. Start withmedium, then walk-test the room. Lower it or change placement if movement outside the intended area triggers the sensor.detection_intervalis the minimum interval between detections the device reports. A shorter interval allows more frequent updates and can use more battery.occupancy_timeout, in the Z2M device options, is the software delay before Z2M publishes occupancy false after the last report. It must be at least the detection interval. Without an override, Z2M uses the reported detection interval plus two seconds.
For lighting, try a 30-second detection interval and a two-minute Home Assistant light-off delay after occupancy clears. This keeps the hardware reporting reasonably often while giving the room a longer grace period. A 120-second detection interval would instead create a two-minute gap in which fresh movement may not be reported.
For an alert sensor, a shorter interval may be useful when you need repeated reports, but test battery life and notification frequency. For a bathroom or a seated workspace, choose a longer light-off delay than you would in a hallway. A PIR sensor can miss someone who remains still regardless of sensitivity.
For MQTT configuration, publish to zigbee2mqtt/living_room_p1/set after waking the device. The payload for the starting settings is:
{"detection_interval":30,"motion_sensitivity":"medium","trigger_indicator":false}
Replace the friendly name in the topic with your own. Confirm the new values in the device’s published state; a request sent while the sensor sleeps can fail.
Lux threshold: read-only, not a trigger in the device
Current Z2M reports light level as illuminance in lux. It does not offer a writable “only detect below this lux” threshold for the P1. Put that condition in Home Assistant.
The sample arrives with movement, so the value shown on the dashboard may remain unchanged in an empty room. It can also rise when the automation switches on the light. The first example below reads illuminance from the same MQTT message as the movement report, avoiding a race between separately updated HA entities. Adjust the 80-lux example threshold after checking readings in your room.
Disabling the LED indicator
Use trigger_indicator: false to disable the blue flash on motion. Briefly press the pairing button before applying this setting in Exposes. Leave it enabled during the first walk test if the visual confirmation helps, then switch it off for a bedroom installation.
This controls the motion indicator. It does not stop the device from showing its pairing/status light when you operate the button.
Example automations
Each YAML block below is a single automation for Home Assistant’s automation editor: create an empty automation, choose Edit in YAML and replace its contents. If you maintain automations.yaml directly, add each as a list item instead. Replace the friendly name, entity IDs, mode helper and notification action before enabling them.
1. Motion-triggered lights with lux condition
This turns on the living-room light when a P1 report contains both movement and an illuminance reading below 80 lux. Missing or invalid light readings do not pass the condition.
alias: Living room lights - P1 motion and lux
triggers:
  - trigger: mqtt
    topic: zigbee2mqtt/living_room_p1
    value_template: '{{ "ON" if value_json.occupancy | default(false) else "OFF" }}'
    payload: "ON"
conditions:
  - condition: template
    value_template: >-
      {{ trigger.payload_json.illuminance is defined
         and (trigger.payload_json.illuminance | float(99999)) < 80 }}
actions:
  - action: light.turn_on
    target:
      entity_id: light.living_room
mode: single
Use a separate light-off automation. It waits until the HA occupancy entity has remained off for two minutes. Another motion report sets occupancy on again and cancels that pending trigger.
alias: Living room lights - P1 motion cleared
triggers:
  - trigger: state
    entity_id: binary_sensor.living_room_p1_occupancy
    to: "off"
    for: "00:02:00"
conditions: []
actions:
  - action: light.turn_off
    target:
      entity_id: light.living_room
mode: single
With a 30-second detection interval and the default Z2M clear timeout, switch-off is approximately 32 seconds plus the two-minute HA delay after the last reported motion. Check this using the automation trace. Home Assistant does not preserve a pending for trigger across a restart or automation reload; for a restart-safe deadline, use a stored helper and scheduled check.
This simple pair controls the named light even if someone turned it on manually. Add a lighting-mode helper or a manual-override condition if that would be unwelcome in your room.
2. Away-mode intrusion alert
Create an input_select.home_mode helper with an Away option, or replace it with the mode/presence entity you already use. This sends a notification on an off-to-on occupancy transition while Away.
alias: Away mode - P1 motion alert
triggers:
  - trigger: state
    entity_id: binary_sensor.living_room_p1_occupancy
    from: "off"
    to: "on"
conditions:
  - condition: state
    entity_id: input_select.home_mode
    state: "Away"
actions:
  - action: notify.mobile_app_your_phone
    data:
      title: Motion detected
      message: Living room P1 detected movement while Away.
mode: single
Use the exact notification action registered by your Companion App. Test it while home and inspect the trace before relying on it. Normal mobile push delivery can involve external services even though the sensor, MQTT report and automation run locally.
Zigbee mesh tips
The P1 is a battery-powered Zigbee end device and does not relay other devices’ messages. Its installed location needs a reliable path to the coordinator or a compatible router.
Choose a device documented as a Zigbee router, such as a suitable powered smart plug. Being mains-powered alone does not make a device a router; some no-neutral switches are end devices. Build router coverage before placing battery sensors at the edge of the network.
Use the Z2M network map and logs to investigate repeated disconnects. A normal occupancy false/true cycle is not, by itself, evidence of a weak connection: Z2M intentionally clears the state between reports. Look for failed messages, unavailable states or lost interviews, then check power, interference and the parent route.
Troubleshooting
- No join: Check that the broker and coordinator are connected, Permit join is open and the reset light blinks. Try the alternative join sequence described earlier, fresh batteries and a short wake-up press.
- Joined but interview fails: Keep the device awake with short presses and check the P1-specific adapter-firmware requirements. Retry near a known working parent.
- Drops out after installation: Compare the installed position with the successful pairing location. Check the router path and 2.4 GHz interference before repeatedly resetting the sensor.
- Occupancy stays on longer than expected: Read both
detection_intervalandoccupancy_timeout. Repeated motion reports restart Z2M’s clear timer. Inspect the MQTT messages to distinguish that from an unavailable device. - Configuration did not change: Wake the P1 immediately before writing, then confirm the returned value. A Home Assistant restart is not normally a reason for the physical sensor to lose its settings.
- Lux or battery seems stale: Lux is motion-sampled; battery can report slowly. Check the last message rather than expecting continuous polling.
- Unexpected movement: Check placement, pets, sunlight and nearby heat sources. Sensitivity controls distance and cannot guarantee pet immunity.
No-cloud checklist
For this setup, the path is P1 → Zigbee coordinator → Zigbee2MQTT → your MQTT broker → Home Assistant. The P1 has no Wi-Fi/Ethernet connection or Aqara account registration. A local coordinator avoids an Aqara hub in that control path.
Keep the broker private and confirm that the automation controls a local light integration. Home Assistant updates, downloaded OTA files, remote access and mobile notifications may still use the internet; they are separate from the P1’s Zigbee traffic. Blocking the entire HA host is unnecessary just to stop a P1 contacting Aqara and may break unrelated services.
For the distinction between local device control and online app services, see the Aqara privacy policy and local-mode guide.
Recommendation
The P1 is a useful motion sensor when you want adjustable reporting and sensitivity in Zigbee2MQTT. Pair it, wake it before changing settings, and test the light-off behavior with the room occupied. Keep the hardware interval and the automation’s delay separate.
For a room where people remain still, consider a presence sensor or combine motion with another occupancy signal. For hallways and short visits, the P1 may cover the job on its own. Neither case requires replacing older sensors that already work.
Related guides: Aqara Hub E1 with Home Assistant and Xiaomi and Aqara Zigbee devices through Zigbee2MQTT.