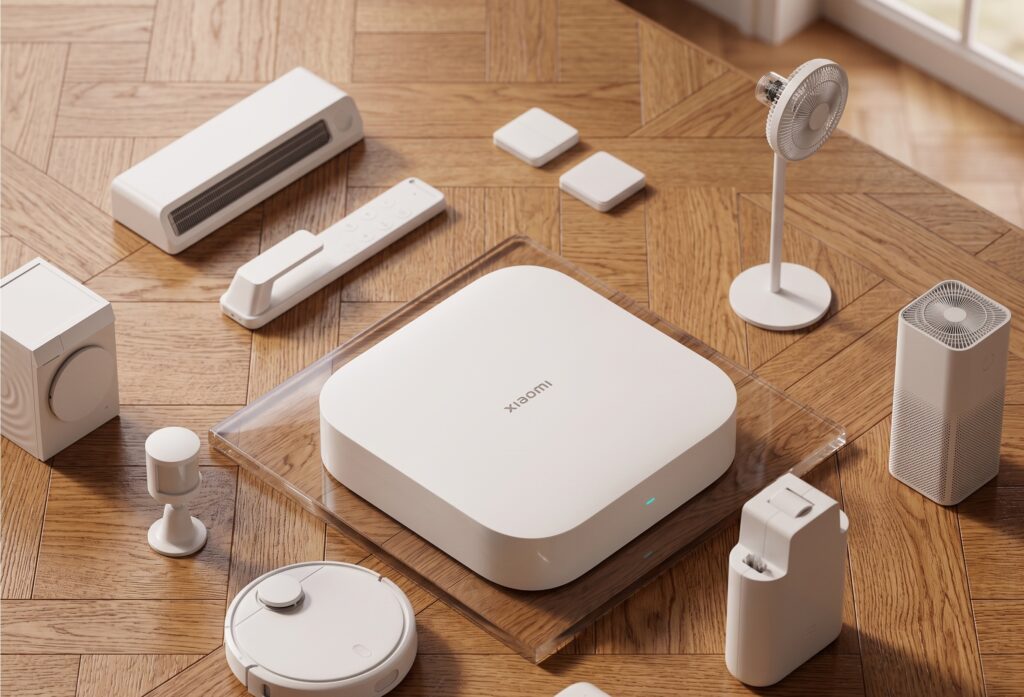
Xiaomi and Aqara make some of the cheapest, most reliable Zigbee sensors on the market. Motion sensors under $10. Door contacts smaller than a matchbox. Temperature sensors with year-long battery life. There is one catch: out of the box, these devices are designed to phone home. Setup requires the Mi Home or Aqara app, and full automation depends on Xiaomi’s cloud infrastructure. For most people that’s fine. For the rest of us, it isn’t.
The good news is that virtually every Xiaomi and Aqara Zigbee device can be paired directly to a Zigbee2MQTT coordinator connected to Home Assistant — bypassing the hub, bypassing the cloud, giving you 100% local control. Your automations run whether or not Xiaomi’s servers are up. Your motion triggers don’t traverse a data center in Shenzhen.
The less-good news: Xiaomi Zigbee devices have a well-documented quirk around router compatibility. Pair them wrong — or let them route through the wrong repeater — and devices will silently drop off the network, sometimes within hours. Most guides skip this part. We don’t.
This guide covers everything: coordinator selection, channel configuration, Zigbee2MQTT installation, the router compatibility trap, device pairing, and verification that no traffic touches Xiaomi’s cloud.
Why Ditch the Aqara or Xiaomi Hub Entirely
The Aqara Hub M2 and Hub M3 support HomeKit and a degree of local automation — but with important asterisks. Initial device setup still requires the Aqara app and a cloud account. Advanced automations involving device state from outside HomeKit require cloud. Third-party integrations route through Aqara’s servers unless you use a local API, which is unofficial and subject to breaking with firmware updates.
The Mi Home ecosystem is less generous. Cloud dependency runs deeper, and the local control options are more limited.
Zigbee2MQTT sidesteps all of this. It treats your coordinator as a direct Zigbee network controller, pairs devices as first-class Zigbee nodes, and exposes everything over MQTT to Home Assistant. No hub manufacturer in the middle. No cloud API that can be revoked. Your devices work the same whether Xiaomi’s servers are up, deprecated, or behind a firewall. If you want to understand the hub-based approach and its trade-offs, see our comparison of the Aqara Hub M2 vs M3 for local control or the Aqara E1 Hub setup guide for Home Assistant.
What You Need
Before starting, have the following in place:
- Home Assistant — Home Assistant OS (HAOS) or Supervised installation. The add-on approach described here does not apply to Home Assistant Container or Core without additional work.
- A Zigbee USB coordinator (or Ethernet-based coordinator) — hardware details in the next section.
- Mosquitto broker add-on — available from the official HA add-on store.
- Zigbee2MQTT add-on — installed from a custom add-on repository (URL in the install section below).
- Zigbee devices to pair — Xiaomi or Aqara Zigbee-based sensors, switches, or plugs. Note: Wi-Fi devices (like the Aqara FP2 presence sensor) and Matter-over-Thread devices (like the Aqara P2 series sensors) use different integration paths and are not paired via Zigbee2MQTT. See our Aqara FP2 local Home Assistant guide for the FP2.
Coordinator Selection for Xiaomi Devices
Your coordinator is the USB or network device that acts as the Zigbee radio for your network. Not all coordinators are equal, and Xiaomi devices are among the more demanding clients.
Recommended chip families:
- Silicon Labs EFR32MG24 — the current first choice for new builds. Strong processing headroom, improved RF performance, active SDK development, and future Thread/Matter co-existence support. Look for adapters like the Sonoff Zigbee Dongle Plus MG24, Home Assistant Connect ZBT-2, or SMLight SLZB-06MG24.
- Silicon Labs EFR32MG21 — the established Silicon Labs option; cost-effective and well-proven in medium-sized networks. The Sonoff ZBDongle-E and the original HA SkyConnect (ZBT-1) use this chip. A solid buy if you want to spend less and don’t need the MG24’s headroom.
- Texas Instruments CC2652P — reliable and widely deployed, including the popular Sonoff Zigbee 3.0 USB Dongle Plus. Texas Instruments has stopped active SDK development for this chip family, so it is maintenance-mode rather than a growth platform. If you already own one, keep using it. For a new purchase, either Silicon Labs option is the better long-term choice.
Chips to avoid for new builds:
- CC2531 — older, limited range, firmware support in maintenance mode. Fine if you already own one; not worth buying new.
- CC2530-based sticks — same situation.
USB vs. Ethernet coordinator:
USB coordinators plug directly into the HA host. Simple, cheap, no network dependency. The downside: they must be physically near the server, which may not be the best radio position in your home.
Ethernet (IP-based) coordinators let you position the radio centrally. They add complexity and a point of network dependency, but can substantially improve coverage in large homes. For most setups, a USB coordinator on a long USB extension cable achieves similar results at lower cost.
Always use a USB extension cable. USB 3.0 ports radiate interference in the 2.4GHz band. A 1–2 meter USB 2.0 extension cable moves the coordinator away from the host and its USB 3.0 stack. This is not optional advice — it is one of the most common causes of poor Zigbee range and device instability on otherwise good hardware.
Zigbee Channel Selection
Zigbee operates in the 2.4GHz band, the same band as Wi-Fi. The Wi-Fi 2.4GHz channels overlap with Zigbee channels, and interference causes dropped packets, missed device joins, and general instability.
The Zigbee channel spectrum (11–26) maps to specific frequency ranges. Wi-Fi channels 1, 6, and 11 each occupy a ~22MHz slice of that band. The Zigbee channels that avoid all three common Wi-Fi channels are:
- Zigbee channel 15 — sits between Wi-Fi 1 and 6
- Zigbee channel 20 — sits between Wi-Fi 6 and 11
- Zigbee channel 25 — sits above Wi-Fi 11 and is usually clear (verify your environment)
- Zigbee channel 26 — similar to 25, but some devices have reduced transmit power on 26; avoid unless you have a specific reason
Before picking a channel, check which Wi-Fi channels are in use in your environment. On Linux, sudo iwlist wlan0 scan | grep Frequency or a Wi-Fi analyzer app on your phone will show you. Match your Zigbee channel choice to what’s least contested.
You set the channel in Zigbee2MQTT’s configuration during initial setup. You cannot change the Zigbee channel after your network is formed without resetting all devices — this is a Zigbee protocol constraint, not a Z2M limitation. Pick your channel before you pair anything.
Installing and Configuring Zigbee2MQTT in Home Assistant
Step 1: Install Mosquitto
In Home Assistant, navigate to Settings → Add-ons → Add-on Store. Search for Mosquitto broker and install it. After installation:
- Start the add-on and enable Start on boot.
- Go to Settings → People and create a dedicated HA user for MQTT (e.g.,
mqtt_user) with a strong password. Mosquitto will use HA’s auth system.
Step 2: Add the Zigbee2MQTT Add-on Repository
Zigbee2MQTT is not in the official HA add-on store. Add its repository manually:
- Go to Settings → Add-ons → Add-on Store.
- Click the three-dot menu (top right) → Repositories.
- Add the official Z2M repository URL:
https://github.com/zigbee2mqtt/hassio-zigbee2mqtt - Click Add, then Close, and refresh the page. Zigbee2MQTT should appear. Install it.
Two versions are listed: Zigbee2MQTT (stable, recommended for most users) and Zigbee2MQTT Edge (development branch — more features, less stable). Use stable.
Step 3: Identify Your Coordinator’s Serial Path
Plug in your coordinator. In HA, go to Settings → System → Hardware and find the serial device. You want the by-id path (e.g., /dev/serial/by-id/usb-ITead_Sonoff_Zigbee_3.0_USB_Dongle_Plus_...), not the bare /dev/ttyUSB0 path. The by-id path is stable across reboots; ttyUSB paths can shift if you plug in other USB devices.
Step 4: Configure Zigbee2MQTT
In the Z2M add-on, open the Configuration tab and set at minimum:
serial:
  port: /dev/serial/by-id/YOUR_COORDINATOR_ID_HERE
mqtt:
  server: mqtt://core-mosquitto
  user: mqtt_user
  password: your_mqtt_password
advanced:
  channel: 20  # or your chosen channel
Start the add-on. Check the Log tab for successful coordinator detection. You should see a line indicating the coordinator firmware version and the Zigbee channel confirmed.
The Xiaomi/Aqara Zigbee Router Compatibility Issue
This section is the one most guides skip — and the reason Xiaomi Zigbee setups fail silently for so many people.
Zigbee is a mesh network. Mains-powered devices act as routers — they repeat signals for battery-powered end devices. Battery-powered sensors (motion, door, temperature) are end devices. An end device picks one router to associate with and funnels all its traffic through it.
Xiaomi and Aqara Zigbee end devices are picky about which routers they will associate with. The Zigbee specification allows for manufacturer-specific behavior in how end devices select and maintain router associations, and Xiaomi devices enforce stricter handshake requirements than the specification strictly requires. The result: a Xiaomi door sensor paired to a generic Zigbee smart plug as its router will sometimes work fine for days, then silently stop responding. No error. Just gone.
An additional wrinkle: older Aqara sensors (pre-Zigbee 3.0) are “sticky” — they won’t re-route to a better parent even when their current one becomes unreliable. You can’t fix this with placement adjustments. You fix it by choosing the right routers from the start.
Known-problematic routers for Xiaomi end devices:
- Many generic Tuya-based smart plugs (especially those based on ZTU or TYWE-series modules)
- Centralite plugs
- OSRAM/Ledvance plugs and bulbs (particularly older models — widely reported as problematic)
- Newer IKEA TRÅDFRI models including the TRETAKT have shown Aqara drops in recent community reports; check your exact model
- Legrand, GE, Iris, and Sylvania devices appear regularly in community problem reports
- Certain Sengled bulbs used as routers
Known-safe routers for Xiaomi end devices:
- Sonoff Zigbee smart plugs (S26R2ZB and similar) — widely confirmed compatible, Zigbee 3.0
- Aqara smart plugs (SP-EUC01 and similar) — same ecosystem, Zigbee 3.0, reliable choice
- IKEA TRÅDFRI plugs (many models) — generally compatible, but results with the newest IKEA plug generations are mixed; verify your specific model before deploying at scale
- Coordinator itself — end devices can always associate directly to the coordinator if in range
Practical guidance:
If your Xiaomi devices keep dropping off, don’t adjust the channel first. Check which router they’re associating with. In the Zigbee2MQTT web UI (accessible via the Z2M add-on web interface), navigate to the Map view. You’ll see each device and which node it routes through. If a Xiaomi device is routing through a generic plug, that’s likely your problem.
The fix: remove the incompatible router from your network, or replace it with a known-compatible model. Alternatively, place your Xiaomi devices physically close enough to the coordinator or a known-safe router that they associate there directly.
Pairing Xiaomi and Aqara Zigbee Devices
Standard Zigbee sensors — motion, door/window, temperature, leak, vibration — pair directly to Zigbee2MQTT without any prior hub setup or app provisioning. You do not need to first add them to the Aqara or Mi Home app.
- In the Zigbee2MQTT web UI, click Permit join (All) to open the network to new devices. You have approximately 3 minutes.
- Locate the pairing button on your device:
- Most Aqara sensors: a small button on the side or bottom; some have a pinhole reset button.
- Xiaomi motion sensors: typically a button on the bottom or inside the battery compartment.
- Door/window sensors: the button is usually on the larger piece (the part with the battery).
- Hold the button for 5 seconds until the LED blinks rapidly (typically 3 blinks), indicating pairing mode.
- Watch the Z2M log (Log tab in the add-on). You’ll see messages like
New device joined, followed byInterviewing, thenInterview successfuland the device name. - Once joined, click Disable joining to close the network.
If a device shows Interview failed repeatedly, move it physically closer to the coordinator and retry. Interview failures at distance are common — Xiaomi devices can be range-sensitive during the pairing handshake even if they’ll operate fine at that distance once paired.
After pairing, the device will appear in Home Assistant automatically via the Zigbee2MQTT MQTT discovery mechanism — no additional HA configuration needed.
Verifying Local-Only Operation
After devices are paired and working, verify that no traffic is reaching Xiaomi or Aqara servers.
DNS-level blocking (recommended approach):
If you run a Pi-hole or AdGuard Home instance on your network, add these domains to your blocklist:
*.mi.com*.aqara.com*.miot-spec.org*.miui.com*.xiaomi.com
After adding the block, watch your Zigbee2MQTT logs and Home Assistant for several minutes. Device state changes should still arrive correctly — they’re routing over Zigbee → Z2M → MQTT → HA, with no cloud involvement.
Functional offline test:
Disconnect your router’s WAN connection (unplug the modem, or block internet at the router level). Trigger a motion sensor. If HA receives the event and fires an automation, your setup is fully local. This is the definitive test.
What to expect: Zigbee2MQTT itself does check for firmware updates and may try to reach GitHub on startup. This is not privacy-relevant (no device data leaves your network), but if you want fully air-gapped operation, disable OTA updates in Z2M’s config.
Common Issues and Fixes
Device drops off the network after hours or days: Most likely a router compatibility issue. Open the Z2M map, identify the router the device was associating through, check if it’s on the problematic list above. Also check your coordinator’s USB extension cable — if it’s absent or plugged into a USB 3.0 port, interference may be causing instability network-wide.
Low link quality readings (LQI below 50): LQI (Link Quality Indicator) below 50 indicates a weak signal. Move the device closer to the coordinator or a compatible repeater, or add a Sonoff or Aqara plug in an intermediate location. LQI of 50–150 is functional. Above 150 is solid.
“Interview failed” during pairing: The device connected to the network but Z2M couldn’t read its capabilities. This usually means the device was too far from the coordinator during pairing. Move it to within 2 meters of the coordinator, reset it (hold button until LED blinks 3 times), and re-pair. After a successful interview, move it to its permanent location.
Duplicate devices after re-pairing: If you reset and re-pair a device, Z2M sometimes creates a second entity in HA rather than updating the existing one. In the Z2M web UI, find the old device entry and delete it. In HA, remove the orphaned entity from your devices list. Rename the new entry to match your original entity name to avoid breaking existing automations.
Z2M shows the device but HA doesn’t: Check that MQTT discovery is enabled in Z2M’s config (homeassistant: true at the top level of your Z2M configuration). Restart the Z2M add-on, then check HA’s MQTT integration for newly discovered devices.
What You Can’t Do This Way
- Aqara scenes and automations — any scenes you built in the Aqara or Mi Home app are gone. You rebuild them in Home Assistant. This is usually an upgrade, but it requires time.
- Aqara app remote access — you won’t be able to use the Aqara or Mi Home app to check device status remotely. HA has its own remote access (Nabu Casa, or self-hosted), but the vendor apps are out of the picture.
- IR blasters — Xiaomi and Aqara IR blasters typically don’t expose useful Zigbee endpoints to Z2M in a way that translates to IR code sending. Handle these through dedicated local IR solutions.
- Aqara camera integration — Aqara cameras don’t pair to Zigbee2MQTT. Local RTSP access varies by model and is not guaranteed.
- Hub-dependent device features — some Aqara devices (cube controller, specific scene switches) expose their full feature set only through the Aqara hub’s local protocol. In Z2M, you may get basic on/off but lose multi-action support. Check the Z2M supported devices list for your specific model before committing.
- Aqara FP2 presence sensor — the FP2 is a Wi-Fi device, not a standard Zigbee end device. It has its own local integration path. See our Aqara FP2 Home Assistant local guide.
- Aqara P2 series sensors (Door/Window P2, Motion and Light P2) — these use Matter over Thread, not Zigbee. They integrate with Home Assistant via Matter, not Zigbee2MQTT.
The Payoff
Once this is running, the day-to-day experience is straightforward. New Xiaomi sensors pair in under two minutes. Device state shows up in Home Assistant immediately. Automations fire in under a second. And when your internet goes down — or when Xiaomi decides to restructure its cloud infrastructure, deprecate an API, or require a new app version — none of that touches your home.
The router compatibility work is annoying to get right the first time. But it’s a one-time fix. Choose known-safe repeaters, keep your coordinator on a USB extension cable, pick a clean Zigbee channel, and you’ll have a network that runs for years without intervention.
That’s the trade: a few hours of setup against years of reliability and zero cloud dependency. For a privacy-focused local-first setup, it’s the right trade.