

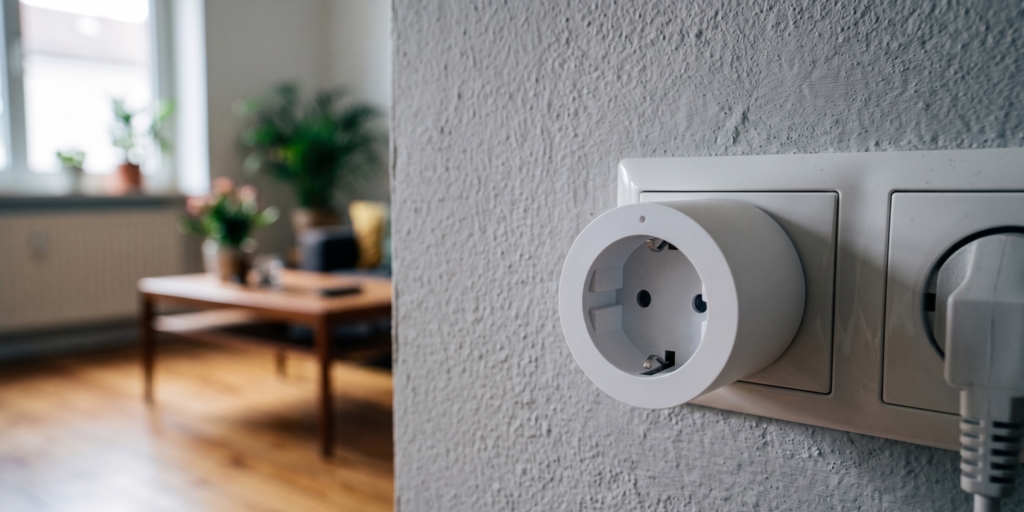
The Aqara SP-EUC01 gives Home Assistant local switching and energy readings through Zigbee2MQTT. It uses Zigbee rather than Wi-Fi, so the plug does not need an Aqara account or an IP connection to the vendor.
Below are the pairing steps, metering entities, Energy dashboard setup, and two automation examples. The troubleshooting section also covers a reported firmware v42 issue that can cause unwanted switching.
This guide covers the EU SP-EUC01. Check your plug’s model, socket format, and electrical rating. Do not apply the EU model’s limits or firmware instructions to a regional variant.
Disclosure: Some links in this article may be affiliate links. We may earn a small commission at no extra cost to you.
Why the SP-EUC01 for a Local Setup
Choose the integration according to where commands and measurements travel. With this plug paired directly to Z2M, both use the local Zigbee and MQTT links.
The plug has no direct internet connection. Your HA host, MQTT broker, remote-access service, and backups determine whether readings are sent elsewhere.
The main features are:
- Full power monitoring. It exposes power (W), energy (kWh), voltage (V), current (A), and device temperature — not just an on/off switch. Many cheaper Zigbee plugs skip the metering entirely or only expose watts.
- Zigbee router functionality. Unlike Zigbee end-devices, the SP-EUC01 actively routes traffic for other Zigbee devices nearby. Plugged into a wall outlet in a dead spot, it extends your mesh without any extra configuration.
- Clean Zigbee2MQTT integration. The device has a stable, well-documented fingerprint in Z2M. Check its device page for supported measurements, settings, and known issues.
Check the 10 A / 2300 W rating against the label and manual for your unit, including any restrictions for the connected load. The internal temperature reading and HA notifications do not replace the plug’s electrical limits.
Prerequisites
This guide assumes you already have:
- A Zigbee coordinator (USB dongle or equivalent) connected to your Home Assistant host
- Zigbee2MQTT installed and running, with a working MQTT broker (Mosquitto)
- Home Assistant with the MQTT integration configured
If Z2M is not running yet, start with our Xiaomi and Aqara Zigbee setup guide.
An Aqara M2 or M3 is a hub-based alternative, not a coordinator that Z2M can use in place of a USB dongle. Our M2 vs M3 comparison explains those routes.
Pairing the SP-EUC01
Step 1: Put Zigbee2MQTT into pairing mode
In the Zigbee2MQTT frontend, click Permit join (All) or permit join for a specific device. You have 255 seconds by default.
Alternatively, enable permit join via the MQTT topic directly:
Topic: zigbee2mqtt/bridge/request/permit_join
Payload: {"value": true, "time": 255}
Step 2: Put the SP-EUC01 into pairing mode
Plug it into a wall outlet. Press and hold the button on the side for 5 seconds until the LED blinks blue rapidly. Release. The device is now in pairing mode.
Step 3: Watch the interview
Wait for Z2M to finish the device interview before testing commands. If the interview stalls, check the join log and try pairing closer to the coordinator.
Expected interview output (Z2M log):
Interview successful
Vendor: Aqara
Model ID: lumi.plug.maeu01
Step 4: Rename the device
Give it a friendly name in the Z2M frontend — plug_desk, plug_server_rack, etc. This name becomes the MQTT topic base and the entity name in Home Assistant.
All Exposed Entities in Home Assistant
After pairing, the SP-EUC01 exposes the following entities via MQTT discovery. You’ll find them automatically in Home Assistant under the device entry.
Core entities
| Entity | Type | What it gives you |
|---|---|---|
switch |
Switch | On/off control |
power |
Sensor (W) | Real-time power draw |
energy |
Sensor (kWh) | Cumulative energy consumption |
voltage |
Sensor (V) | Mains voltage at the plug |
current |
Sensor (A) | Current draw |
device_temperature |
Sensor (°C) | Internal plug temperature |
Control and protection entities
| Entity | Type | What it does |
|---|---|---|
consumer_connected |
Binary sensor | Detects whether a physical load is plugged in |
overload_protection |
Number (W) | Sets the documented power cutoff threshold |
auto_off |
Switch | Turns off after consumption stays below 2 W for 20 minutes |
button_lock |
Switch | Disables physical button on the plug |
led_disabled_night |
Switch | Turns off the status LED during configured night hours |
A note on consumer_connected: This entity reports whether a device is physically connected to the plug, not whether the connected device is actively drawing power. A phone charger with no phone will typically still register as consumer_connected: true. Exact detection sensitivity varies by load — test with your specific appliances.
Check the HA device page after MQTT discovery completes. Some configuration entities may be disabled by default.
Energy Dashboard Integration
The energy sensor (kWh) feeds directly into Home Assistant’s Energy dashboard for long-term statistics.
Step 1: Confirm the sensor is logging long-term statistics
In Home Assistant, go to Settings → Devices & Services → Entities, find your plug’s energy sensor (e.g., sensor.plug_desk_energy), and confirm that:
- State class:
total_increasing - Unit of measurement:
kWh
These attributes are needed for energy statistics. If the sensor is not available in the dashboard, check HA’s statistics diagnostics and recorder configuration.
Step 2: Add to Energy dashboard
Go to Settings → Dashboards → Energy (or navigate to the Energy dashboard and click the configure button).
Under Individual devices, click Add device. Select your plug’s energy sensor from the list.
Allow HA to collect energy statistics before assessing consumption. Available history depends on the readings already recorded, not simply on when you added the sensor to the dashboard.
Step 3: Tariff configuration (optional)
For a cost estimate, apply your tariff to recorded consumption and account for any rate changes. Check the cost features available in your HA version rather than assuming every individual-device row calculates a price automatically.
Practical Automations
The two examples below each belong in a separate automation’s YAML editor. Substitute your plug’s power and switch entities, and use your phone’s actual notification service for the alert. Each block contains one automation, rather than the full automations.yaml file.
High-power notification
This example reports a sustained high reading. It is a monitoring aid, not overload protection or a guarantee that a load is safe.
alias: "Desk Plug High-Power Alert"
trigger:
  - platform: numeric_state
    entity_id: sensor.plug_desk_power
    above: 2000
    for:
      seconds: 10
action:
  - service: notify.mobile_app_your_phone
    data:
      title: "High Power Reading"
      message: "Desk plug exceeding 2000W for 10+ seconds"
Choose a threshold appropriate to the appliance and the plug’s limits. Replace the notification service with your phone’s actual service name and test delivery. Phone push notifications may depend on internet access.
Auto-off on idle (low-power detection)
Useful for device chargers: cut power when the connected device is fully charged and drawing near zero.
alias: "Plug Auto-Off When Idle"
trigger:
  - platform: numeric_state
    entity_id: sensor.plug_desk_power
    below: 5
    for:
      minutes: 30
condition:
  - condition: state
    entity_id: switch.plug_desk
    state: "on"
action:
  - service: switch.turn_off
    target:
      entity_id: switch.plug_desk
The 5 W and 30-minute settings are examples. Observe the appliance’s standby behaviour first, and avoid auto-off for equipment that needs continuous power.
Power outage memory behavior: By default, the SP-EUC01 is reported to restore its last known state after a power outage, though this has not been independently verified on all firmware versions. If predictable power-on state matters for your use case (e.g., a server or UPS bypass), test this on your specific firmware and configure Z2M device options accordingly.
Known Issue: Firmware v42 Router Bug
If the plug changes state unexpectedly, inspect HA traces, Z2M logs, bindings, and the installed firmware. Firmware v42 is one documented cause, rather than a fault every owner will necessarily encounter.
Z2M’s SP-EUC01 notes describe unwanted toggling caused by some control switches when routed through a v42 plug. The linked issue #13903 includes reports and a downgrade workaround. Compare the firmware and triggering device with your own setup.
Look for state changes following a nearby remote or switch action, with no matching HA automation. Use logs to establish a pattern; a single unexplained toggle is not enough to identify this firmware issue.
How to check your firmware version:
In the Zigbee2MQTT frontend, open the SP-EUC01 device page and look for the OTA or firmware version field. The build number will indicate v42 (or the equivalent build string).
Workaround: Downgrade to v32
The documented temporary workaround uses older v32 firmware with a modified version header to pass the downgrade check. Follow the issue’s instructions for the exact plug and Z2M version if your symptoms match. Do not downgrade an otherwise working plug just because an older guide recommends it.
Before attempting the workaround, read the full procedure and recovery considerations in issue #13903. Check the file source and model, retain the current configuration, and verify both switching and metering afterwards.
Network and Mesh Contribution
The SP-EUC01 can route messages for other Zigbee devices. Its location therefore affects more than the appliance plugged into it.
Placement tips for mesh coverage:
- Position the plug roughly midway between your coordinator and any devices that have weak signal or intermittent connectivity.
- The Z2M network map (found under Map in the frontend) will show routing paths before and after adding a new router. Use this to confirm the plug is actually being used as a route.
- Plugs placed behind metal enclosures (server racks, electrical panels) will have reduced RF performance. Prefer open wall outlets.
- This plug supports routing, but not every mains-powered Zigbee device does. Check each model before relying on it to extend coverage.
If you see unwanted switching, resolve it before using the plug for an appliance that needs predictable power.
No Cloud Blocking Required
Unlike Wi-Fi smart plugs — where you often need to firewall DNS or block outbound connections to vendor servers — the SP-EUC01 requires no cloud blocking. It’s a Zigbee device. It has no IP address. It cannot reach the internet.
If you also use IP-connected Aqara devices, assess their connections separately. Our Aqara local-mode overview covers that distinction.
IoT VLAN note: the Zigbee radio link is separate from IP networking. HA, Z2M, and the MQTT broker still need the appropriate local network access, whether on one subnet or routed between VLANs.
SP-EUC01 vs SP-EUS01: Region Note
SP-EUC01 — EU version. Type F/Schuko plug. 230V. This is what this guide covers.
For a North American unit, check its exact model and its own integration documentation. The EU rating and firmware files are not transferable.
Similar regional names do not establish identical firmware or exposed entities. Use the supported-device entry for the model on the label.
What to check before regular use
Confirm that switching and metering work, add the energy sensor to HA, and check behaviour after a power cut. Those tests matter more than the number of entities on the device page.
If unwanted toggling occurs, compare your setup with the v42 report above. Follow a workaround only when the model, version, and symptom match.
The cumulative kWh reading is useful for comparing an appliance’s consumption over time. Allow HA to collect data before drawing conclusions from the Energy dashboard.
For related setup details, see the Aqara local-mode guide and P1 motion sensor guide.
Have a firmware version not mentioned here, or a different behavior on consumer_connected? The Z2M GitHub issues page for SP-EUC01 is the best place to track ongoing device-specific bugs.