

Aqara Door and Window Sensor T1 (MCCGQ12LM): Zigbee2MQTT + Home Assistant Setup Guide
An Aqara MCCGQ12LM can join Zigbee2MQTT without finishing its interview. If it appears in the log but has no working contact entity, keep it awake with short reset-button presses while the interview runs. The device page documents this behaviour.
Pair the T1 directly to your coordinator, then use MQTT discovery to bring it into Home Assistant. An Aqara hub or cloud account is not required for this route.
What is the MCCGQ12LM?
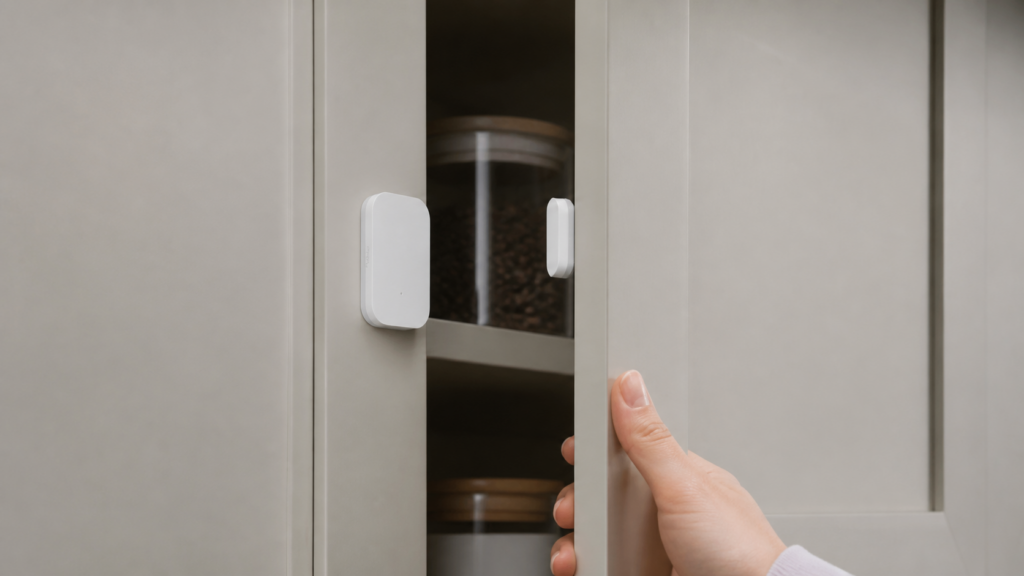
The MCCGQ12LM is Aqara’s Zigbee 3.0 door and window sensor, sold as the “Door and Window Sensor T1.” It’s a two-piece contact sensor: a body with the electronics and a magnet that attaches to the moving part of the door or window. When the two halves come within 15 mm of each other, the sensor reports closed.
This T1 model uses Zigbee 3.0. Aqara’s MCCGQ12LM specifications list a CR1632 battery. Check the exact model label when ordering a replacement.
The Zigbee2MQTT device page lists contact, battery, and voltage. It does not expose the older sensor’s device-temperature and event-count diagnostics.
The T1 is a battery-powered end device. It does not relay traffic for other sensors, so it needs a reliable path to a powered router or coordinator.
T1 vs original vs P1: which should you buy?
| Feature | MCCGQ11LM (original) | MCCGQ12LM (T1) | MCCGQ13LM (P1) |
|---|---|---|---|
| Zigbee version | Earlier Zigbee generation | Zigbee 3.0 | Zigbee 3.0 |
| Battery | CR1632 | CR1632 for MCCGQ12LM | Check the P1 model label/manual |
| Entities | 6 (contact, battery, voltage, device_temp, power_outage_count, trigger_count) | 3 (contact, battery, voltage) | Contact, battery, battery_low |
| OTA updates | No | No | No |
| Max detection gap | ~15 mm | ~15 mm | Check the installation manual |
The original MCCGQ11LM has additional diagnostic reports. The P1 is a separate model with its own battery and installation requirements. For ordinary door automations, start by checking contact reporting and reliable mounting rather than counting entities.
The T1 is a reasonable choice when you need a simple contact sensor supported by your existing Zigbee setup. Measure the frame and check the exact model’s battery and mounting requirements before buying.
See our MCCGQ11LM setup guide for a full breakdown of the original, and the P1 (MCCGQ13LM) guide for the P1.
What you need
- A Zigbee USB coordinator paired with Zigbee2MQTT. A Sonoff Zigbee 3.0 USB Dongle Plus is a solid, widely used choice, but any Z2M-compatible coordinator works.
- Zigbee2MQTT running and connected to Home Assistant via MQTT
- Home Assistant with the MQTT integration configured
- The MCCGQ12LM sensor and magnet
Pairing the T1 — and the fix for the most common failure
The problem
An incomplete interview can leave the sensor listed without usable contact reports. Check the interview status in Zigbee2MQTT before troubleshooting Home Assistant discovery.
The sensor can go to sleep before Zigbee2MQTT finishes reading its capabilities. If the log shows an incomplete interview, short button presses can keep it awake. Missing Home Assistant entities can also come from MQTT discovery, so check the interview result first.
How to pair correctly
-
Open Zigbee2MQTT and enable pairing mode (the permit join toggle in the Z2M dashboard or Devices panel in HA).
-
Find the reset button shown in the device manual. Use its normal control; do not insert a tool into an unidentified opening.
-
Press and hold the reset button for approximately 5 seconds until the blue LED blinks. This initiates the pairing sequence.
-
Immediately after the long press: keep pressing the button briefly, roughly once per second. You don’t need to hold it — a quick press to trigger a flash from the LED is enough.
-
Continue short presses until Zigbee2MQTT reports that the interview completed. Watch the log rather than stopping after a fixed number of seconds.
-
Watch the Z2M log. You should see the interview complete and the device description populate.
If it still fails, check the battery and try closer to the coordinator or a suitable router. Retry the interview while keeping the device awake. Remove and re-pair if needed, noting any automations that use the existing entity.
What you’ll see after a successful pair
After a successful interview, Zigbee2MQTT should list contact, battery, and voltage. Home Assistant discovers the supported entities through MQTT; their actual names and enabled state depend on your setup.
binary_sensor.<device>_contactsensor.<device>_batterysensor.<device>_voltage
Zigbee2MQTT reports contact: true when closed and false when open. Home Assistant presents that as off for closed and on for open. Use the Home Assistant states in the examples below.
Entities in Home Assistant
The main device values are:
binary_sensor.<device>_contact — the main working sensor. on = door/window open, off = closed. This is what your automations will use.
sensor.<device>_battery — reported battery percentage. The first report can take up to 24 hours. A new battery is not guaranteed to display exactly 100%.
sensor.<device>_voltage — battery voltage in millivolts. This model’s documented exposes do not include a separate low-battery flag.
Users upgrading from the MCCGQ11LM will notice device_temperature, power_outage_count, and trigger_count are gone. The T1 does not expose them. If you were using trigger_count to log open/close frequency, you’d need to handle that in an HA counter helper instead.
Configuration and quirks
Debounce for sliding doors
If you’re installing the T1 on a horizontal sliding door or window, you may see multiple conflicting state messages in quick succession as the door moves. The sensor registers the magnet passing through detection range at different distances during travel.
The following device entry belongs in devices.yaml. If you keep device entries in configuration.yaml, place it under devices:. Replace the IEEE address:
'0x<ieee_address>':
  friendly_name: 'front_sliding_door'
  debounce: 1
In a device-specific configuration, debounce: 1 delays publication until updates have settled for one second. This can smooth conflicting sliding-door reports, but it can also hide brief open/close events. Test whether that trade-off suits the automation.
Battery reporting delay
The first battery percentage can take up to 24 hours. If contact reporting works, a missing initial battery value is not by itself a failed pairing. Check battery condition and logs if reports remain absent.
No OTA updates
The current device page does not list OTA support for MCCGQ12LM. Check it again before planning maintenance; do not assume that buying a hub guarantees an available update.
Building automations
Four practical examples using the contact binary sensor.
Entry alert
Send a notification when the door opens. Replace the sensor and phone action with those from your installation.
alias: "Front door opened - alert"
trigger:
  - platform: state
    entity_id: binary_sensor.front_door_contact
    to: "on"
action:
  - service: notify.mobile_app_your_phone
    data:
      message: "Front door opened"
Door left open reminder
Notify if a door stays open for more than 5 minutes, then repeat every 5 minutes until it closes.
alias: "Front door left open"
trigger:
  - platform: state
    entity_id: binary_sensor.front_door_contact
    to: "on"
    for:
      minutes: 5
action:
  - repeat:
      while:
        - condition: state
          entity_id: binary_sensor.front_door_contact
          state: "on"
      sequence:
        - service: notify.mobile_app_your_phone
          data:
            message: "Front door has been open for {{ ((now() - states.binary_sensor.front_door_contact.last_changed).total_seconds() / 60) | int }} minutes"
        - delay:
            minutes: 5
Night security alert
This example requests an iOS critical notification when the front door opens between 22:00 and 07:00. Replace the notify action with your phone’s action and enable the required notification permissions. Android uses different notification options.
alias: "Night security - door/window open"
trigger:
  - platform: state
    entity_id: binary_sensor.front_door_contact
    to: "on"
condition:
  - condition: time
    after: "22:00:00"
    before: "07:00:00"
action:
  - service: notify.mobile_app_your_phone
    data:
      title: "Security alert"
      message: "Front door opened during night hours"
      data:
        push:
          interruption-level: critical
Window open, pause climate
This example turns the bedroom climate entity off when the window opens. Confirm that the entity supports the requested HVAC mode.
alias: "Pause climate on open window"
trigger:
  - platform: state
    entity_id: binary_sensor.bedroom_window_contact
    to: "on"
action:
  - service: climate.set_hvac_mode
    target:
      entity_id: climate.bedroom_ac
    data:
      hvac_mode: "off"
Pair this with a reverse automation that resumes climate when the window closes, or leave it manual if you prefer control.
Troubleshooting
Sensor is in Zigbee2MQTT but has no entities in Home Assistant. Check whether the interview completed. If not, retry while keeping it awake. If Zigbee2MQTT already shows working contact reports, check Home Assistant’s MQTT integration and Zigbee2MQTT discovery setting.
Battery entity shows “unavailable” after pairing.
Normal. The T1 sends battery reports on its own schedule. Wait up to 24 hours for the first reading.
Contact state seems reversed — HA shows “on” when door is closed.
Double-check your installation. binary_sensor state = on means the door is open (contact broken). If the physical state is wrong, verify the magnet is within 15 mm of the sensor body when the door is closed, and that neither piece is mounted backwards relative to each other.
Device keeps dropping from Z2M.
End-devices need a reasonably close router or coordinator. The T1 does not route, so if it’s far from the nearest powered Zigbee device, it may drop. Add a router-capable device (a plug, a relay module, or a router-mode adapter) nearer to the sensor.
I’m upgrading from MCCGQ11LM and I can’t find device_temperature.
It’s not available on the T1. The stripped entity set is a deliberate difference between the models, not a Z2M bug. If you need device temperature for diagnostics, the original MCCGQ11LM remains available.
Installation notes
Sensor body mounts to the fixed frame; the smaller magnet piece mounts to the moving door or window leaf. Or the reverse — either orientation works as long as the two pieces align within 15 mm when closed.
Keep the sensor and magnet aligned within the installation gap specified by the manual. Test open and closed states before fixing the adhesive pads permanently. A different sensor model should not be assumed to offer an adjustable threshold.
Check both pieces against the frame before mounting, especially on recessed or uneven surfaces.
Use the battery type specified for your exact unit; Aqara lists CR1632 for MCCGQ12LM. Battery life depends on reporting frequency, signal quality, and cell condition. Use the percentage and voltage reports as diagnostics rather than assuming a fixed two-year life.
For those coming from a hub-based setup or considering one as an alternative: the Aqara Hub E1 guide covers the E1 hub path if you’d rather keep Aqara’s native integration in the loop. And for the integration method question in general, our ZHA vs Zigbee2MQTT comparison compares ZHA against Z2M for Aqara devices.
After mounting, open and close the door several times and check the live state, notification delivery, and any delay added by debounce.