

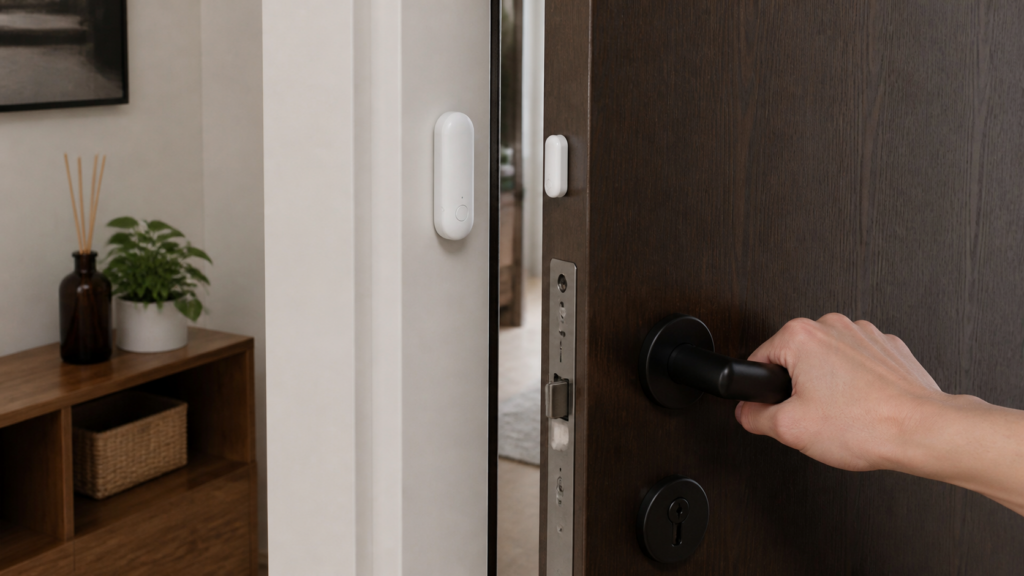
Aqara Door & Window Sensor P1 (MCCGQ13LM): Local Setup in Home Assistant
The Aqara Door and Window Sensor P1 pairs directly to Zigbee2MQTT without any Aqara hub, cloud account, or Mi Home involvement. I’ve been running a handful of these across cabinet doors and a few entry points, and they work exactly as advertised in a fully local setup. The one thing that catches people is the detection distance setting — it exists, it matters, and setting it requires a small ritual that isn’t obvious from the Zigbee2MQTT device page alone.
This guide walks through pairing the MCCGQ13LM to Zigbee2MQTT, what entities show up in Home Assistant, and how to actually configure that detection distance. If you’re already running Zigbee2MQTT and want to add a contact sensor that stays entirely on your network, this is one of the cleaner options in the Aqara lineup — and it fits the same hub-free approach covered in our guide to running Aqara Zigbee devices in Home Assistant without the Aqara hub.
What Is the Aqara Door and Window Sensor P1?
The P1 (model code MCCGQ13LM, Zigbee model lumi.magnet.ac01) is Aqara’s mid-tier contact sensor. It does what every contact sensor does — reports open or closed based on whether the sensor body and magnet are near each other — but it adds one hardware feature the cheaper E1 and older T1 models don’t have: a configurable detection distance.
On the E1 and T1, the gap threshold is fixed. The door either has enough separation for the sensor to trigger, or it doesn’t. The P1 lets you choose between 10 mm, 20 mm, and 30 mm. That’s the separation gap at which the sensor calls it “open.” Whether that matters depends on your door frames and how much door movement you actually want to detect.
The P1 uses a CR123A battery rather than the CR2032 common in smaller sensors. That’s a larger cell, which generally means longer life, but it also means the sensor body is correspondingly chunkier.
What You Need
- A running Zigbee2MQTT instance with a compatible coordinator (SONOFF ZBDongle-P, ConBee II, CC2652P-based adapters, or similar)
- An MQTT broker connected to your Home Assistant instance
- The MCCGQ13LM sensor and its magnet half
- A CR123A battery (usually included)
No Aqara hub. No Mi Home app. No cloud account.
If you’re deciding between Zigbee2MQTT and ZHA for Aqara gear, our ZHA vs Zigbee2MQTT comparison for Aqara devices covers how each handles attribute exposure and quirks.
Pairing the P1 to Zigbee2MQTT
1. Open permit join
In the Zigbee2MQTT frontend, click the permit join button (or toggle it via the MQTT topic zigbee2mqtt/bridge/request/permit_join with payload {"value": true}). The default join window is 254 seconds.
Keep your coordinator physically close to the sensor during pairing — the P1 has a short pairing window once you trigger it, and distance can cause it to drop out mid-handshake.
2. Trigger pairing mode on the sensor
Press and hold the small reset button on the sensor body for approximately five seconds. The LED will blink, indicating the device is broadcasting for a coordinator.
If the first attempt doesn’t pair within a few seconds, press the button again without holding — sometimes a short press re-initiates the broadcast within the same join window. If it still doesn’t pair, close the join window, re-open it, and retry the long press.
3. Confirm the device appears
Once paired, the device will appear in the Zigbee2MQTT devices list as lumi.magnet.ac01. Home Assistant will pick it up via MQTT discovery within a minute or two. Look for a new device with the friendly name you assigned (or the default IEEE address).
Entities in Home Assistant
The MCCGQ13LM exposes four entities via Zigbee2MQTT:
contact — the binary sensor you’ll use in automations. In Zigbee2MQTT’s raw payload, the contact property is true when closed and false when open. Note that Home Assistant’s binary sensor inverts this for display: under the opening/door device class, a closed door shows off and an open door shows on. Keep that mapping in mind when you write automations (more on this below). This is the core entity.
battery — percentage charge remaining. I check this monthly across all contact sensors; the CR123A in this one tends to report accurately down to the low battery threshold.
voltage — battery voltage in millivolts. Useful if you want more granular battery monitoring than the percentage value provides. Some people use this to build their own low-battery automations with tighter thresholds.
tamper — activates if the sensor cover is removed. Not relevant for everyday operation, but if you’re mounting sensors in locations where physical tampering matters (a door you want to monitor for both state and interference), it’s worth building a tamper alert automation.
Configuring Detection Distance
This is where the P1 earns its differentiation from the E1 and T1. The detection_distance entity accepts three values: 10mm, 20mm, or 30mm.
What those values mean in practice: the number is the separation gap the magnet and body must reach before the sensor reports “open.” At 10mm, even a small gap trips it — the most sensitive setting, useful if you want to detect a door that’s been opened just a crack. At 30mm, the door has to swing further open before the sensor reports it — the least sensitive setting, which helps ignore doors that vibrate or don’t close flush. The tradeoff at the sensitive end is more false positives on those same loose-fitting doors.
I run most of mine at 20mm, which is the middle ground. On a well-fitting door frame, that’s enough to catch any intentional opening while ignoring normal settling.
Setting detection distance via MQTT
There’s a configuration window sequence required before the command will take effect. The device needs to be in a receptive state — you trigger this by pressing the sensor button once (short press, not the long hold used for pairing). After that, you have a brief window to send the MQTT command.
Publish to the set topic for your device:
Topic: zigbee2mqtt/<friendly_name>/set
Payload: {"detection_distance": "20mm"}
Replace <friendly_name> with whatever you named the device in Zigbee2MQTT, and replace "20mm" with your preferred value ("10mm", "20mm", or "30mm").
You can also set this from the Zigbee2MQTT frontend under the device’s settings tab if your version exposes writable attributes there. The MQTT approach is more reliable across Z2M versions.
Example Automations
Basic open/close alert
alias: "Front door open notification"
trigger:
  - platform: state
    entity_id: binary_sensor.front_door_contact
    to: "on"
action:
  - service: notify.mobile_app
    data:
      message: "Front door opened"
In Home Assistant, the contact binary sensor reads on when the door is open and off when it’s closed — the standard behavior for the opening/door device class. (That’s the inverse of Zigbee2MQTT’s raw contact property, where true means closed.) So an open-door automation triggers on to: "on".
Tamper alert
If you want a notification when someone physically removes the sensor from its mount:
alias: "Door sensor tamper alert"
trigger:
  - platform: state
    entity_id: binary_sensor.front_door_tamper
    to: "on"
action:
  - service: notify.mobile_app
    data:
      message: "Tamper detected on front door sensor"
The tamper entity is off under normal conditions and flips to on when the cover is removed. It resets automatically when the cover is reseated.
P1 vs E1 vs T1 — Which Should You Buy?
| Feature | P1 (MCCGQ13LM) | E1 (MCCGQ14LM) | T1 / older (MCCGQ11LM) |
|---|---|---|---|
| Detection distance | Configurable (10/20/30 mm) | Fixed | Fixed |
| Battery | CR123A | CR2032 | CR2032 |
| Works without hub | Yes | Yes | Yes (most firmware) |
| Z2M support | Yes | Yes | Yes |
The E1 is smaller, uses a CR2032, and is perfectly fine for most doors. If detection distance tuning matters — sliding doors, cabinet doors with loose frames, or gaps you want to monitor more sensitively — the P1 is the right choice. The T1 (MCCGQ11LM) is the older model; still supported by Zigbee2MQTT but the P1 supersedes it with no real downside. For a full walkthrough of the smaller sibling, see our Aqara Door & Window Sensor E1 (MCCGQ14LM) setup guide.
Frequently Asked Questions
Does the Aqara Door and Window Sensor P1 work without the Aqara Hub?
Yes. The MCCGQ13LM pairs directly to any Zigbee2MQTT coordinator. No Aqara hub, no Mi Home account, no cloud dependency needed.
What is the detection distance setting and how do I change it?
Detection distance is the separation gap the sensor body and magnet must reach before the sensor reports “open.” The P1 offers 10 mm, 20 mm, and 30 mm options — 10 mm is the most sensitive (trips on a small gap), 30 mm the least (the door must open further). To change it: press the sensor button once (short press) to open the configuration window, then publish an MQTT set command to zigbee2mqtt/<friendly_name>/set with payload {"detection_distance": "20mm"} (or your chosen value).
How do I pair the Aqara P1 contact sensor to Zigbee2MQTT?
Open permit join in Zigbee2MQTT, then long-press the sensor’s reset button for about five seconds until the LED blinks. The device has a short pairing window, so keep the coordinator nearby. If the first attempt fails, retry within the same join window with a short button press.
What battery does the Aqara MCCGQ13LM use?
A CR123A. It’s larger than the CR2032 used in the E1 and T1, which generally means longer battery life, but check that you have a spare before mounting the sensor in a hard-to-reach spot.
How does the P1 differ from the E1 and T1 door sensors?
The key difference is configurable detection distance. The E1 and T1 have a fixed threshold; the P1 lets you choose between 10 mm, 20 mm, and 30 mm. The P1 also uses a CR123A battery instead of CR2032. All three work with Zigbee2MQTT without a hub.
Once the sensor is paired and reporting in Home Assistant, it behaves like any other binary sensor in the platform — clean state, reliable battery reporting, and no cloud traffic to worry about. If you’re building out Aqara coverage across a space, the P1 sits between the E1 (compact, fixed threshold) and the P2 (Matter/Thread, a different protocol entirely). For most Zigbee2MQTT setups, the P1 is the one to reach for when you want that extra tuning option.