

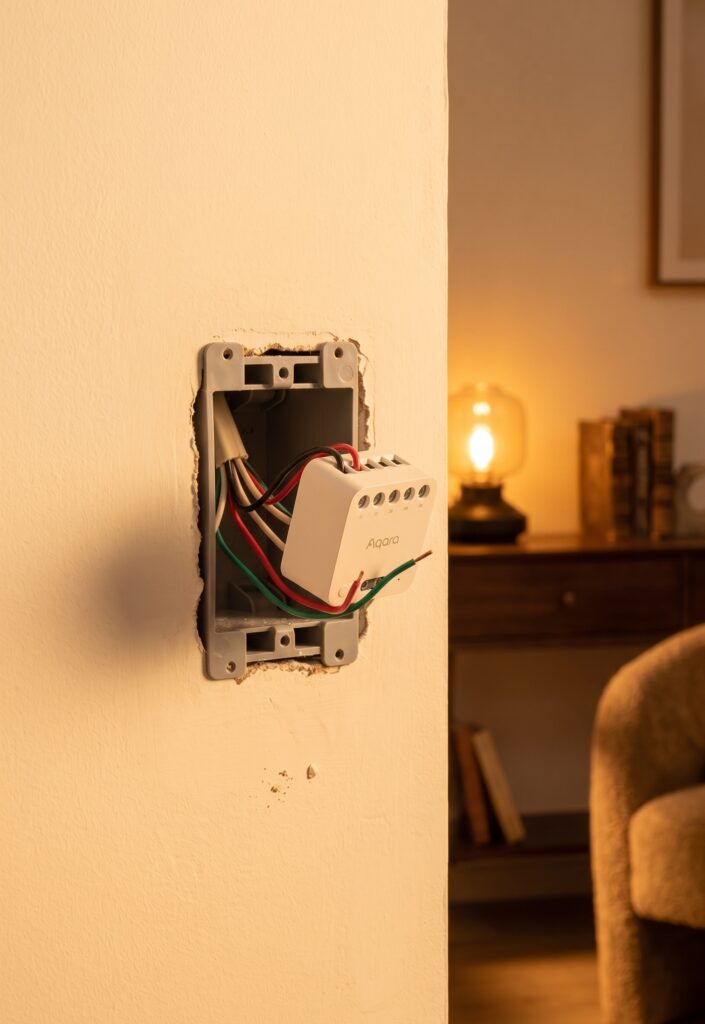
Aqara Single Switch Module T1 in Home Assistant via Zigbee2MQTT
Disclosure: This post contains affiliate links. If you buy through them, I earn a small commission at no extra cost to you.
The Aqara Single Switch Module T1 sits behind your existing wall switch, converts any wired light or fan into a Zigbee device, and pairs directly with Zigbee2MQTT — no Aqara hub required, no cloud, no Mi Home. The concept is straightforward, but there are two variants (SSM-U01 and SSM-U02) with meaningfully different wiring requirements and feature sets, and picking the wrong one for your wall box creates problems.
This guide covers both SKUs side by side: which one suits your wiring, what goes inside the wall, how to pair, what entities appear in Home Assistant, and what to configure once it’s working. There are also a handful of real-world edge cases you should know about before committing to the SSM-U02.
If you’re considering the Aqara hub path instead of Zigbee2MQTT, the Aqara Hub M2 local setup guide covers that route. For general Zigbee2MQTT setup in Home Assistant, our Zigbee2MQTT pillar guide is the starting point if you don’t have that running yet.
What is the Aqara Single Switch Module T1?
The T1 is an in-wall relay — a small module that hides behind your existing switch plate and controls the mains circuit to a light, fan, or outlet. The external switch rocker you press every day stays in place and still works mechanically. The module adds wireless Zigbee control on top of that.
This is the right solution when you want to make an existing hardwired fixture smart without replacing the switch plate or running new wiring. It’s also common in older homes where the switch box has enough depth but the aesthetics of the existing plate are worth keeping.
Physical size of the SSM-U01 is approximately 42.9 × 40 × 19.9 mm per Aqara’s published specifications, which fits most European and British back boxes. The SSM-U02 is in the same ballpark. Australian and US single-gang boxes are tighter — measure before buying.
SSM-U01 (with neutral) vs SSM-U02 (no neutral) — which do you need?
Before anything else, check your switch box for a neutral wire. In most homes built after the 1990s, you’ll find a white or grey wire in the back of the switch box that carries the neutral return — three or four conductors total. If you see that wire, you can use either module. If there are only two conductors in the box (live in, switched live out), you need the SSM-U02.
SSM-U01 (with neutral):
- Requires a neutral wire in the switch box
- Maximum load: 2200W resistive (10A at 220V)
- No minimum load requirement — works with any bulb wattage
- Supports full power metering: watts, kilowatt-hours, volts, amperes
- Acts as a Zigbee router in the mesh (strengthens your network for other devices)
- OTA firmware updates via Zigbee2MQTT
SSM-U02 (no neutral):
- Installs in switch boxes without a neutral wire
- Maximum load: 1250W (5A)
- Minimum load: 3W — very low-wattage LED bulbs (under 3W) may cause flicker or instability
- No power metering
- End device only — does not route for other Zigbee devices in your mesh
- OTA firmware updates via Zigbee2MQTT
If your wiring supports neutral and you care at all about power monitoring or mesh routing, SSM-U01 is the better choice. SSM-U02 is specifically for boxes without neutral — it solves a real wiring constraint, but you’re trading features to do it.
What you need before starting
- A running Zigbee2MQTT instance connected to your Home Assistant — if you haven’t set that up yet, our Zigbee2MQTT pillar guide covers the full setup.
- A compatible Zigbee coordinator — CC2652, CC2530, or any coordinator supported by Zigbee2MQTT will work.
- Mains wiring competence — this module connects directly to line voltage. If you’re not comfortable working inside switch boxes with mains wiring, get a licensed electrician to do the physical installation. The Zigbee pairing and HA configuration steps are all software-side and safe to do yourself after the module is installed.
- The correct SKU — buy before you open the wall. Returning an incorrectly matched module is easier than dealing with it once it’s been unpacked.
Installation — what goes inside the wall
The module wires in series with the existing switch circuit. The external rocker switch remains and continues to function as a manual override — pressing it toggles the relay inside the module.
Wiring for SSM-U01 (with neutral)
Four connections at the module:
- L (Line) — mains live in
- N (Neutral) — neutral in
- L1 (Load) — switched live out to the fixture
- S1 — connects to the external switch (one terminal of the rocker)
The second terminal of the rocker connects back to L (line), so toggling the rocker sends a signal on S1 that the module detects and uses to toggle its own relay.
Wiring for SSM-U02 (no neutral)
Three connections at the module:
- L (Line) — mains live in
- L1 (Load) — switched live out to the fixture
- S1 — connects to the external switch (one terminal of the rocker)
The module draws its operating power through the load (the bulb), which is why there’s a minimum 3W load requirement. Very low-wattage LEDs don’t pass enough current for the module’s internal circuitry at idle.
A note on switch box depth: both modules are compact, but adding any relay behind a switch plate reduces available depth. Plastic back boxes in older installations sometimes run shallow — check you have at least 25mm of depth before fitting.
Pairing with Zigbee2MQTT
The pairing procedure is the same for both SKUs. Before starting, put Zigbee2MQTT into pairing mode from the Z2M frontend or Home Assistant UI (the “Permit join” toggle).
Primary method (button on the module):
- With the module powered and installed, locate the small pairing button on the module body.
- Press and hold for 8 seconds until the LED starts flashing blue.
- Release. The module is now in pairing mode.
- In Zigbee2MQTT, watch the device list — it should appear within 30–60 seconds as
Aqara SSM-U01orAqara SSM-U02.
Alternative method for SSM-U02 (external switch):
If the module is already installed and accessing the button is awkward, toggle the connected external switch on and off five times in sequence. This puts the SSM-U02 into pairing mode the same way.
Once the device appears in Z2M, give it a meaningful friendly_name (e.g., switch_kitchen_extractor or light_hallway_ceiling) before doing anything else. Renaming after adding automations creates entity ID headaches.
Entities in Home Assistant
After pairing, Home Assistant will see the module through the Zigbee2MQTT integration. The entity set differs significantly between the two SKUs.
SSM-U01 entity list (with neutral, power metering)
| Entity | Type | Notes |
|---|---|---|
switch.{name} |
Switch | Main on/off control |
sensor.{name}_power |
Sensor | Current draw in watts |
sensor.{name}_energy |
Sensor | Cumulative kWh |
sensor.{name}_voltage |
Sensor | Mains voltage (V) |
sensor.{name}_current |
Sensor | Current draw (A) |
sensor.{name}_device_temperature |
Sensor | Module internal temperature |
sensor.{name}_power_outage_count |
Sensor | How many times power was cut |
select.{name}_power_outage_memory |
Select | On/off/toggle after restore |
select.{name}_switch_type |
Select | Toggle or momentary |
The energy sensor accumulates from the last reset, which is useful for tracking consumption on extractors, pumps, or anything you want to monitor over time.
SSM-U02 entity list (no neutral, no power metering)
| Entity | Type | Notes |
|---|---|---|
switch.{name} |
Switch | Main on/off control |
sensor.{name}_device_temperature |
Sensor | Module internal temperature |
sensor.{name}_power_outage_count |
Sensor | How many times power was cut |
select.{name}_power_outage_memory |
Select | On/off/toggle after restore |
select.{name}_switch_type |
Select | Toggle or momentary |
No power metering on the SSM-U02 — that’s an architectural limit of no-neutral designs, not a firmware gap.
Configuration options
Power outage memory
Both modules support configuring what state they return to after a power cut. Options are on, off, and toggle (restore previous state). The toggle option is usually what you want for lights — a light that was on before a power cut comes back on. For devices where unexpected activation would be a problem (a boiler, say), set it to off.
Set this via the power_outage_memory select entity in Home Assistant, or send an MQTT message to the device’s set topic.
Switch type — toggle vs momentary
By default both modules expect a standard toggle rocker. If you’re fitting the module behind a momentary-press button (common in staircase wiring, or European installations with pulse switches), change switch_type to momentary. This changes how the module interprets the S1 input — instead of tracking switch position, it triggers on each press.
The community refers to this as “rebound switch” mode in some Home Assistant forum threads. It’s the same setting — switch_type: momentary in Zigbee2MQTT maps to that behavior.
Timed shutoff (on_time / off_wait_time)
Both modules support timed operation via MQTT parameters. You can send an on command with an on_time value (in seconds) and the relay will cut power automatically after that time. This is useful for bathroom extractors, garage lights, or any application where you want a physical “run for N minutes then stop” behavior without an HA automation doing the timing.
You can also send off_wait_time alongside an on command to delay the actual activation. These parameters go in the MQTT payload — Home Assistant automations can construct these via the mqtt.publish service action.
Known issues and caveats
SSM-U02 minimum load and LED flicker
The 3W minimum load is real and enforced by physics. LED bulbs rated under 3W — common in decorative fittings and some European indicator lights — may flicker at low states or cause the module to behave inconsistently. Standard LED bulbs (5W or above) are fine. If you’re unsure, check the bulb’s rated wattage, not the equivalent incandescent number printed on the box.
SSM-U02 is an end device, not a mesh router
This matters if you have a large Zigbee network or plan to place the SSM-U02 in a room far from your coordinator. End devices cannot relay traffic for other devices — they connect directly to the nearest router or coordinator. If that path is weak, expect join failures and connectivity drops.
The SSM-U01 with neutral is a full Zigbee router. Installing one or more SSM-U01 units in a central location is a practical way to extend mesh coverage alongside adding switch control. The SSM-U02 does not help with this.
For comparison, the Aqara H1 no-neutral wall switch has the same end-device limitation in no-neutral configurations — it’s a consistent pattern in no-neutral Zigbee devices.
SSM-U02 rare coordinator crash (GitHub issue #24058)
At least one confirmed report in the Zigbee2MQTT issue tracker documents an SSM-U02 unit causing Z2M crashes when toggled. This appears to be a device-specific defect rather than a systematic SSM-U02 problem — the reports are isolated, and most SSM-U02 users don’t encounter it.
If you do see Z2M crashing when toggling the module, the recommended workaround is to remove the device from Z2M and re-pair it. A second pair usually resolves the instability. If it persists, the unit may be defective — contact Aqara support.
SSM-U01 vs SSM-U02 — quick comparison
| Feature | SSM-U01 (with neutral) | SSM-U02 (no neutral) |
|---|---|---|
| Neutral wire required | Yes | No |
| Maximum load | 2200W | 1250W |
| Minimum load | None | 3W |
| Power metering | Yes (W, kWh, V, A) | No |
| Zigbee role | Router | End device |
| OTA updates | Yes | Yes |
| Power outage memory | Yes | Yes |
| Switch type config | Yes | Yes |
| Timed shutoff | Yes | Yes |
Both are fully supported in Zigbee2MQTT. Both work entirely locally once paired — no Aqara account, no Mi Home, no cloud dependency.
Frequently asked questions
Does the Aqara Single Switch Module T1 need a hub?
No. Paired with Zigbee2MQTT, it connects directly to your Zigbee coordinator and Home Assistant without an Aqara hub. If you want the Aqara hub path, our Aqara Hub M2 guide covers that separately.
What is the difference between SSM-U01 and SSM-U02?
SSM-U01 requires a neutral wire and includes power metering and Zigbee routing. SSM-U02 works without a neutral wire but has no power metering and functions as an end device only. See the comparison table above.
Can the Aqara switch module work without a neutral wire?
Yes — that’s what the SSM-U02 is for. The tradeoff is no power monitoring, a 3W minimum load, and no mesh routing contribution.
Does the SSM-U02 support power monitoring?
No. Power metering is only available on the SSM-U01. The SSM-U02 exposes only switch state, device temperature, outage memory settings, and outage count.
How do I set up the Aqara switch module with a momentary or pulse switch?
After pairing, find the switch_type select entity in Home Assistant and change it to momentary. This tells the module to treat each press-and-release of the S1 input as a toggle command rather than tracking switch position. Works with standard momentary buttons and European pulse-switch wiring.
The SSM-U01 and SSM-U02 are both solid modules for retrofit smart switching — the question is always which variant matches your wiring. Get the neutral check right before ordering and the rest of the setup is clean. Power metering on the SSM-U01 is a genuine bonus if you’re tracking energy use on anything that runs for hours; the SSM-U02 keeps it simple when the wall won’t cooperate.