Aqara Water Leak Sensor in Home Assistant via Zigbee2MQTT (No Hub)
A water leak caught in the first ten seconds is a damp cloth job. One that runs for thirty minutes while your phone is on silent is a floor replacement. The difference is often whether your alert system depends on a cloud server that’s having a bad day.
The Aqara water leak sensor is one of the cheapest and most reliable Zigbee sensors on the market. Paired directly to Home Assistant through Zigbee2MQTT, it reports locally — no Aqara Hub required, no Mi Home account, no latency from a round-trip to Beijing. When water hits the sensor, your automation fires in under a second.
This guide covers both current models (SJCGQ11LM and SJCGQ12LM), walks through pairing in Zigbee2MQTT, explains the entities you’ll see in Home Assistant, and gives you ready-to-use automations: instant push notification, critical repeat alert, and optional smart valve shut-off.
By the end you’ll have a fully local water leak detection setup running.
Hardware Overview
SJCGQ11LM vs SJCGQ12LM — What’s the Difference?
Both sensors look nearly identical: a small white puck with a water-drop logo on top and two metal detection screws on the underside. The difference is in the Zigbee version.
| Feature | SJCGQ11LM | SJCGQ12LM |
|---|---|---|
| Zigbee version | 1.2 | 3.0 |
| Battery | CR2032 | CR2032 |
| Battery life | ~2 years | ~2 years |
| Mesh routing | Limited (end device) | Better compat (Zigbee 3.0) |
| Status | Older / being phased out | Current model |
If you’re buying new, get the SJCGQ12LM. Zigbee 3.0 meshes better with modern coordinators and routers. If you already have the SJCGQ11LM, it works fine — just pair it close to your coordinator and keep the path short.
Both models are supported by Zigbee2MQTT with no quirks configuration needed.
How the Sensor Works
The two metal screws on the underside complete a circuit when water bridges them. The sensor triggers on as little as 0.5mm of standing water.
It reports a single binary state: water detected or not. There’s no volume measurement, no gradual scale. When the screws get wet, it fires. When they dry out, it clears.
Placement tips:
– Flat on the floor, directly on the surface you want to monitor — not on a shelf above it
– Screw-side down, obviously
– Near but not under an appliance (you need to be able to swap the battery)
– Avoid placing where cleaning water regularly splashes (you’ll get false positives)
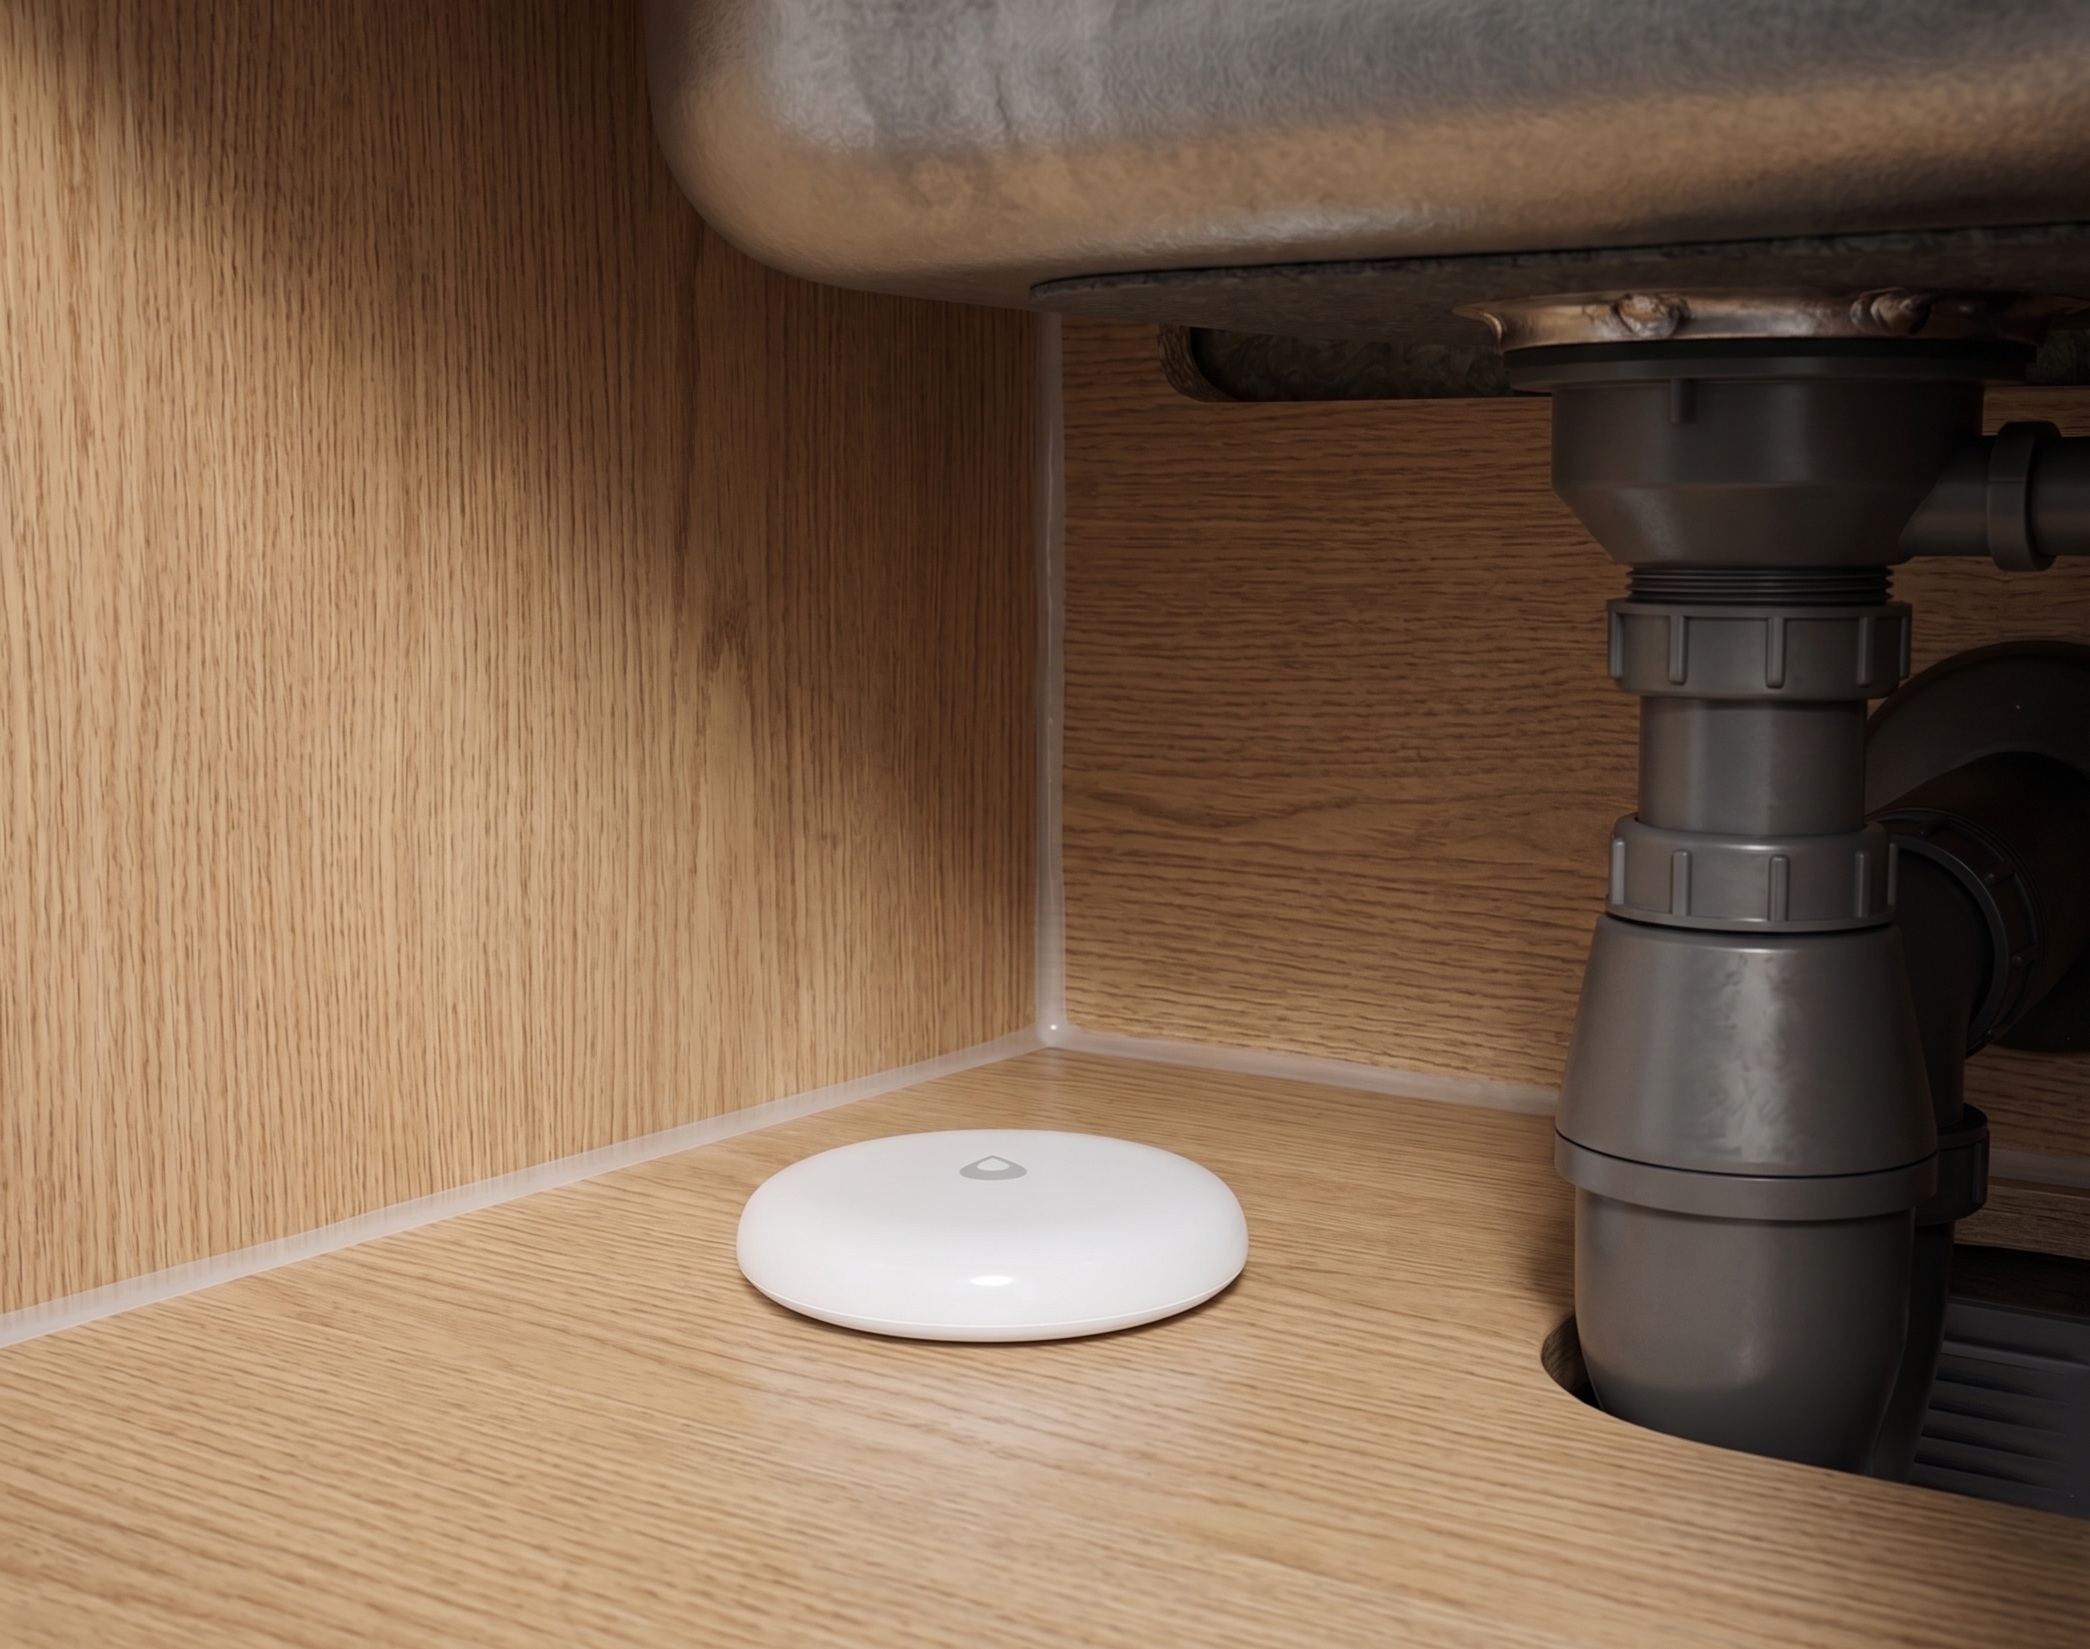
Good locations: under the kitchen sink, behind the dishwasher, beside the washing machine, next to the water heater or boiler, along the perimeter of a basement floor.
Pairing to Zigbee2MQTT
Prerequisites: Home Assistant running with Zigbee2MQTT installed and configured. If you haven’t done that yet, see the guide on setting up Zigbee2MQTT in Home Assistant first — this guide picks up from there.
Step 1: Enable Permit Join
In Home Assistant, open the Zigbee2MQTT panel (sidebar → Zigbee2MQTT). Click the Permit join toggle at the top. Z2M will accept new devices for the next 254 seconds by default.
Alternatively, you can permit join for a specific group or the whole network — for a new sensor, whole-network join is fine.
Step 2: Put the Sensor in Pairing Mode
Flip the sensor over. On the underside, you’ll see a small reset button beside the water-drop logo.
Press and hold the reset button for approximately 5 seconds until the LED blinks blue rapidly. That’s the pairing signal. Release the button.
The sensor will attempt to join the Zigbee network. The Z2M interview process takes 10–20 seconds.
Step 3: Confirm the Device Appears
In the Zigbee2MQTT panel, go to the Devices tab. You should see a new device with model number SJCGQ11LM or SJCGQ12LM and a friendly name like 0x00158d000xxxxxxx.
Rename it immediately — something like Water Sensor Kitchen Sink. This name carries through to your Home Assistant entity IDs, so clear naming now saves you from ugly entity names later.
Pairing Troubleshooting
Sensor LED blinks but device doesn’t appear in Z2M:
First suspect: low battery. A CR2032 that reads 2.8V or lower may not have enough power to complete the full Zigbee interview. Swap in a fresh battery before troubleshooting anything else.
SJCGQ11LM won’t pair reliably:
Zigbee 1.2 devices can have mesh compatibility issues with certain coordinator firmware. Pair it within 1–2 metres of your coordinator (temporarily move it if needed), complete the interview, then move it to its final location. Once interviewed, it usually stays connected.
Device disappears from Z2M after a day:
Check whether Permit Join timed out mid-interview. If Z2M stopped accepting joins before the interview finished, the device was partially paired and will drop off. Re-pair from scratch with Permit Join active for the full interview duration.
Device shows as “interviewing” indefinitely:
Force-remove the device from Z2M, restart Z2M, re-enable Permit Join, and re-pair. This clears any stale interview state.
Entities in Home Assistant
Once paired, Z2M creates several entities automatically. Here’s what you’ll see:
binary_sensor.<name>_water_leak
This is the one that matters. It has two states:
– off — no water detected (sometimes labelled clear)
– on — water detected (sometimes labelled wet)
Important: After first pairing, this entity often shows unknown rather than off. That’s normal. The sensor only reports state on change — it doesn’t broadcast its current state on join. It will show clear after the first dry-period report or the first water event. Don’t assume unknown means the sensor is broken.
sensor.<name>_battery
Battery level as a percentage. Reasonably accurate on the SJCGQ12LM. The SJCGQ11LM sometimes reports raw voltage instead of percentage — if you see values like 3.0 instead of 85, you’re seeing volts.
For SJCGQ11LM, you can create a template sensor to convert voltage to approximate percentage:
template:
  - sensor:
      - name: "Water Sensor Kitchen Battery Pct"
        unit_of_measurement: "%"
        state: >
          {% set v = states('sensor.water_sensor_kitchen_sink_battery') | float(0) %}
          {{ [[(v - 2.6) / (3.0 - 2.6) * 100, 0] | max, 100] | min | round }}
Other Entities
sensor.<name>_temperature— ambient temperature at the sensor location. Not its primary purpose, but useful as a secondary data point for detecting a cold-water pipe leak in winter (temperature drops suddenly).sensor.<name>_power_outage_count— counts how many times the device lost power. Useful for detecting dead batteries (count climbs when the sensor keeps rebooting).sensor.<name>_trigger_count— cumulative number of water detection events since last reset. Diagnostic only.
Automation Patterns
Instant Push Notification on Leak
The basic automation: when the sensor detects water, send a push notification to your phone immediately.
alias: "Water Leak — Instant Alert"
description: "Push notification when any water leak sensor triggers"
trigger:
  - platform: state
    entity_id: binary_sensor.water_sensor_kitchen_sink_water_leak
    to: "on"
action:
  - service: notify.mobile_app_your_phone
    data:
      title: "⚠ Water Leak Detected"
      message: "Kitchen sink sensor triggered. Check immediately."
mode: single
Replace binary_sensor.water_sensor_kitchen_sink_water_leak with your entity ID and notify.mobile_app_your_phone with your HA Companion app notify service name.
Testing without water: Briefly bridge the two detection screws with a damp cloth or a wet finger. The sensor will fire within a second. Dry the screws, it clears. Do this when you first install the sensor and periodically after that — you want to know the automation works before you actually need it.
Critical Alert — Repeat Until Acknowledged
A single push notification is easy to miss if your phone is on silent or Do Not Disturb. For a water leak, you want the alert to keep coming until you acknowledge it.
On iOS, the HA Companion app supports critical alerts — these break through DND and play at full volume regardless of your ringer setting:
alias: "Water Leak — Critical Alert iOS"
trigger:
  - platform: state
    entity_id: binary_sensor.water_sensor_kitchen_sink_water_leak
    to: "on"
action:
  - repeat:
      until:
        - condition: state
          entity_id: binary_sensor.water_sensor_kitchen_sink_water_leak
          state: "off"
      sequence:
        - service: notify.mobile_app_your_iphone
          data:
            title: "WATER LEAK"
            message: "Kitchen sink. Check now."
            data:
              push:
                sound:
                  name: default
                  critical: 1
                  volume: 1.0
        - delay:
            minutes: 5
mode: single
This fires the alert, waits 5 minutes, checks whether the leak has cleared, and if not, fires again. Adjust the delay to taste.
Android equivalent: Android doesn’t have a direct critical alert equivalent, but you can use high-priority notifications with the HA Companion app’s ttl: 0 and priority: high data fields, or integrate with apps like Ntfy or Gotify for similar behavior.
Trigger an Alarm
If you have a smart siren or TTS speaker in your setup, you can tie the water sensor to a local alarm:
alias: "Water Leak — Sound Alarm"
trigger:
  - platform: state
    entity_id: binary_sensor.water_sensor_kitchen_sink_water_leak
    to: "on"
condition:
  - condition: state
    entity_id: input_boolean.water_alarm_armed
    state: "on"
action:
  - service: media_player.play_media
    target:
      entity_id: media_player.living_room_speaker
    data:
      media_content_id: "media-source://media_source/local/water_alarm.mp3"
      media_content_type: music
mode: single
The input_boolean.water_alarm_armed guard is optional but useful — it lets you disarm the alarm during planned maintenance without disabling the push notification automation.
Auto Shut-Off Smart Valve Integration
The most impactful automation: detect a leak and automatically close a smart water valve before the damage spreads. This is the combination that turns a sensor into real protection.
You’ll need a compatible Zigbee smart water valve — several Tuya-based and Aqara-compatible valves work with Z2M. Pair the valve first and confirm it works manually before connecting it to this automation.
alias: "Water Leak — Close Shut-Off Valve"
trigger:
  - platform: state
    entity_id: binary_sensor.water_sensor_kitchen_sink_water_leak
    to: "on"
action:
  - service: switch.turn_off
    target:
      entity_id: switch.kitchen_water_valve
  - service: notify.mobile_app_your_phone
    data:
      title: "Water Leak — Valve Closed"
      message: "Leak detected at kitchen sink. Valve closed automatically."
mode: single
Important: Test the valve automation manually before relying on it. Trigger the valve close from the HA UI, confirm water stops flowing, then reopen it. Know where your manual shut-off is in case the smart valve fails or loses power at the wrong moment. This automation supplements manual response — it doesn’t replace knowing your home’s plumbing.
Low Battery Alert
A water leak sensor with a dead battery is a false sense of security. Set up a low battery alert and you’ll never be caught with a sensor that’s been offline for weeks without knowing.
alias: "Sensor Low Battery — Water Leak Sensors"
trigger:
  - platform: numeric_state
    entity_id: sensor.water_sensor_kitchen_sink_battery
    below: 20
action:
  - service: notify.mobile_app_your_phone
    data:
      title: "Low Battery"
      message: "Water sensor (kitchen sink) battery below 20%. Replace CR2032."
mode: single
Set a reminder to physically test each sensor monthly — bridge the screws, confirm the automation fires. Battery percentage is a lagging indicator; physical testing catches silent failures that voltage readings miss.
Placement Guide
Position matters more than most people realise. A sensor three centimetres from where water actually pools won’t catch a leak until it’s already spread.
Under the kitchen sink: Place it at the lowest point, directly below the drain connection or P-trap. This is where supply line failures pool first.
Behind the washing machine: Washing machine hose failures are one of the most common household flood causes. Place the sensor directly behind the machine on the floor, toward the drain connections at the back.
Behind the dishwasher: Similar logic. The sensor goes at the lowest accessible point behind or beside the unit.
Water heater / boiler: Place it on the floor directly below the unit, centred under the pressure relief valve outlet. Anode rod slow leaks and PRV drips pool here first.
Basement perimeter: One sensor per corner covers most slab seepage scenarios. Point the screws toward the wall, not away from it — water wicks along the wall before pooling in the middle.
Tip for all locations: A thin silicone mat under the sensor keeps it stable and prevents it from sliding around during cleaning. Don’t raise it off the floor — that defeats the purpose. If you’re in a location where mopping is common, either accept occasional false positives or mount a non-slip mat that protects the sensor from the mop.
Long-Term Maintenance
Monthly test: Bridge the two detection screws with a slightly damp finger or damp paper towel. You should see the binary sensor flip to on in Home Assistant within a second. Dry the screws — it should clear within 30 seconds. If it doesn’t respond, check that Z2M sees the device as online before assuming the sensor failed.
Battery replacement: The sensor opens with a push-and-twist motion on the top cap — no tools needed. The CR2032 sits in a standard holder. A fresh battery costs under $1 and lasts roughly two years. Keep a spare in your toolkit.
Battery percentage accuracy: The SJCGQ12LM reports percentage reliably. The SJCGQ11LM can report raw voltage — see the template sensor in the Entities section above if you want to convert it to a usable percentage.
Z2M firmware updates: Check zigbee2mqtt.io periodically for OTA firmware updates for your model. Both sensors have received firmware updates through Z2M’s OTA mechanism. Updates are optional but can improve battery reporting accuracy and mesh stability.
Conclusion
The Aqara water leak sensor is one of the highest-return smart home devices you can buy. It costs less than $15, runs for two years on a CR2032, and with Zigbee2MQTT it works entirely locally — no Aqara account, no Mi Home, no cloud dependency.
Local operation means the alert fires before any cloud round-trip could complete. When a washing machine hose fails at 2am, the difference between local and cloud can be the difference between a wet floor and a ruined subfloor.
Set it up once, test it monthly, replace the battery when the alert tells you to. That’s the entire maintenance burden.
Related guides:
– Setting up Zigbee2MQTT in Home Assistant — if you haven’t paired your first Zigbee device yet
– Aqara P1 Motion Sensor in Home Assistant — same pairing process, different use case
– Aqara E1 Hub setup — if you prefer the hub route instead of direct Zigbee