Aqara Water Leak Sensor in Home Assistant (No Hub)
That Amazon listing says “Requires Aqara Hub (not 3rd-Party).” It doesn’t. The Aqara water leak sensor family — original (SJCGQ11LM), T1 (SJCGQ12LM), and E1 (SJCGQ13LM) — all pair directly to any Zigbee coordinator running Zigbee2MQTT. No Aqara hub, no Aqara cloud account, no Aqara app.
This guide covers what you need to get one of these sensors into Home Assistant, what entities it exposes, how to build a useful leak alert automation, and how to handle the known pairing quirks that trip people up.
Does the Aqara water leak sensor really need a hub?
No. The “Requires Aqara Hub” note refers to the setup path Aqara documents and supports — their app, their hub, their cloud. That’s the experience they sell and the one they describe in their documentation.
But all three current models speak standard Zigbee. Any Zigbee coordinator paired with Zigbee2MQTT can interview and read them. The Zigbee2MQTT device pages for the SJCGQ11LM, SJCGQ12LM, and SJCGQ13LM document this support explicitly. The hub restriction is a vendor-scoped documentation choice, not a hardware limitation.
Which model do you have?
All three models work without an Aqara hub via Zigbee2MQTT. The pairing procedure is the same across all three. The practical differences are minor.
| Feature | SJCGQ11LM (original) | SJCGQ12LM (T1) | SJCGQ13LM (E1) |
|---|---|---|---|
| Zigbee2MQTT support | Yes | Yes | Yes |
| water_leak entity | Yes | Yes | Yes |
| battery (percentage) | Yes | Yes | Yes |
| battery_low entity | Yes | Yes | Yes |
| tamper entity | Yes | Yes | Yes |
| voltage entity | Yes | Yes | Yes |
| Retail availability | Widely available (older stock) | Current main model | Newer budget variant |
| Known Z2M issue | None | None | “Unsupported manufacturer” on older Z2M — see Troubleshooting |
If you bought the sensor recently from a retailer listing a current product, you likely have the SJCGQ12LM (T1). The E1 (SJCGQ13LM) is a newer entry-level variant. For the purposes of pairing and using these sensors in Home Assistant, all three behave the same way once they’re on a current Zigbee2MQTT version.
What you need before you start
- A Zigbee coordinator — a CC2652P, SkyConnect, ConBee II, or similar. It needs to be running and recognized by your system.
- Zigbee2MQTT connected to a Mosquitto MQTT broker, integrated with Home Assistant via the MQTT integration. If you don’t have this stack running yet, our Aqara Hub M2 + Home Assistant guide covers the full setup in the context of Aqara devices.
- The sensor itself. It runs on a CR2032 coin cell, which ships installed.
That’s it. No special firmware, no Aqara account, no app.
One precaution worth taking now: if your Zigbee coordinator is a USB stick plugged directly into a USB 3.0 port, move it to a USB 2.0 extension cable (1–2 meters) before you start. USB 3.0 ports emit interference in the 2.4 GHz band that can cause pairing failures and mesh instability. The extension cable moves the dongle clear of the interference source and prevents a whole class of unexplained problems.
Pairing the sensor step by step
Water leak sensors are “sleepy” Zigbee end devices — they spend most of their time in low-power sleep mode, waking only to report state changes. This is good for battery life, but it creates a pairing complication: the device can fall asleep mid-interview before the coordinator finishes the pairing handshake. The result is a failed or incomplete pairing.
The fix is to keep the sensor awake by tapping the button repeatedly throughout the pairing process. Here is the full procedure:
- Open the Zigbee2MQTT dashboard and click Permit join (All) to open the network for new devices.
- Press and hold the button on top of the sensor (located under the water-drop logo) for approximately 5 seconds until the blue LED blinks. This starts the pairing sequence — or factory-resets and re-pairs if the sensor was previously on another network.
- Once the initial long press is done, tap the button once every two seconds. Keep tapping. Don’t stop.
- Watch the Zigbee2MQTT logs. You’re waiting for the interview to complete — you’ll see log entries showing the coordinator exchanging cluster data with the device.
- When the log confirms the device has been interviewed and joined, stop tapping. The device will appear in your Z2M devices list.
- Assign it a friendly name in Zigbee2MQTT. Home Assistant will auto-discover the entities if MQTT discovery is enabled (
homeassistant: truein your Z2Mconfiguration.yaml).
If the sensor was previously paired to an Aqara hub or another Zigbee network: the 5-second hold resets and re-pairs in a single step. You don’t need a separate factory reset procedure.
The tap-through-the-interview approach works reliably. The pairing failures reported in Home Assistant community threads almost all trace back to users who did the initial long press and then put the sensor down — leaving it to sleep partway through the interview.
What you’ll see in Home Assistant
Once the interview completes and entities are discovered, the sensor exposes five entities in Home Assistant:
water_leak — boolean (true/false). This is the primary entity. It turns true when the probes on the base detect conductive liquid. The detection threshold is very low — a thin film of water across the probes is enough to trigger it. The sensor cannot be polled on demand; it only reports on state change.
battery — percentage. A freshly installed CR2032 will read at or near 100%. Note: battery percentage can take up to 24 hours to appear after first pairing. Don’t assume the entity is broken if it shows unavailable immediately after joining.
battery_low — boolean. A convenience entity that turns true when battery drops to a low threshold. Useful as an automation trigger for a “replace battery” notification.
tamper — boolean. Turns true if the sensor casing is opened. Mainly relevant if you’re using the sensor in a location where physical tampering is a concern, or if you just want to know if someone has touched it.
voltage — the raw battery voltage in millivolts. A fresh CR2032 reads around 3000 mV. This entity is mostly redundant if you’re tracking the battery percentage entity, but it’s there.
All entities are read-only. The sensor has no controllable outputs.
Cloud vs. local — what actually changes
When you pair this sensor to an Aqara hub and use the official Aqara app, status updates and alerts route through Aqara’s cloud infrastructure. The hub reports to Aqara’s servers; those servers deliver notifications to your phone. The data path leaves your home network.
Via Zigbee2MQTT, the sensor communicates entirely within your local network. The Zigbee radio transmits to your coordinator; the coordinator passes messages to Zigbee2MQTT via USB; Zigbee2MQTT publishes to your local Mosquitto broker; Home Assistant reads from the broker. Nothing leaves the local network. There is no Aqara server in the path.
For a water leak sensor specifically, this matters practically: local automations trigger without depending on an internet connection or a third-party server being up. A cloud notification path fails if your ISP is down at the wrong moment. A local automation does not.
Building a useful water leak automation
The most important automation is simple: when water_leak turns true, alert immediately. Here is a minimal Home Assistant automation that sends a persistent notification and an optional mobile push notification:
alias: Water leak detected
trigger:
  - platform: state
    entity_id: binary_sensor.water_leak_sensor_water_leak
    to: "on"
action:
  - service: persistent_notification.create
    data:
      title: "Water leak detected"
      message: "{{ trigger.to_state.name }} triggered at {{ now().strftime('%H:%M') }}"
      notification_id: water_leak_alert
  - service: notify.mobile_app_your_phone
    data:
      title: "Water leak"
      message: "Check {{ trigger.to_state.name }} immediately."
condition: []
mode: single
Replace binary_sensor.water_leak_sensor_water_leak with the actual entity ID from your Home Assistant instance, and notify.mobile_app_your_phone with your mobile app notification service.
A few additions worth considering once the basic automation is working:
Battery low alert. A separate automation triggered when battery_low turns true keeps you from missing a dead sensor.
alias: Water sensor battery low
trigger:
  - platform: state
    entity_id: binary_sensor.water_leak_sensor_battery_low
    to: "on"
action:
  - service: persistent_notification.create
    data:
      title: "Water sensor battery low"
      message: "Replace the CR2032 in {{ trigger.to_state.name }}."
condition: []
mode: single
Multiple sensors, one automation. If you deploy sensors under the sink, near the washing machine, and near the water heater, you can either duplicate the automation for each sensor or use a group trigger with platform: state pointing at each entity ID. The notification message template using trigger.to_state.name already gives you the source device name, so a single automation handles all of them.
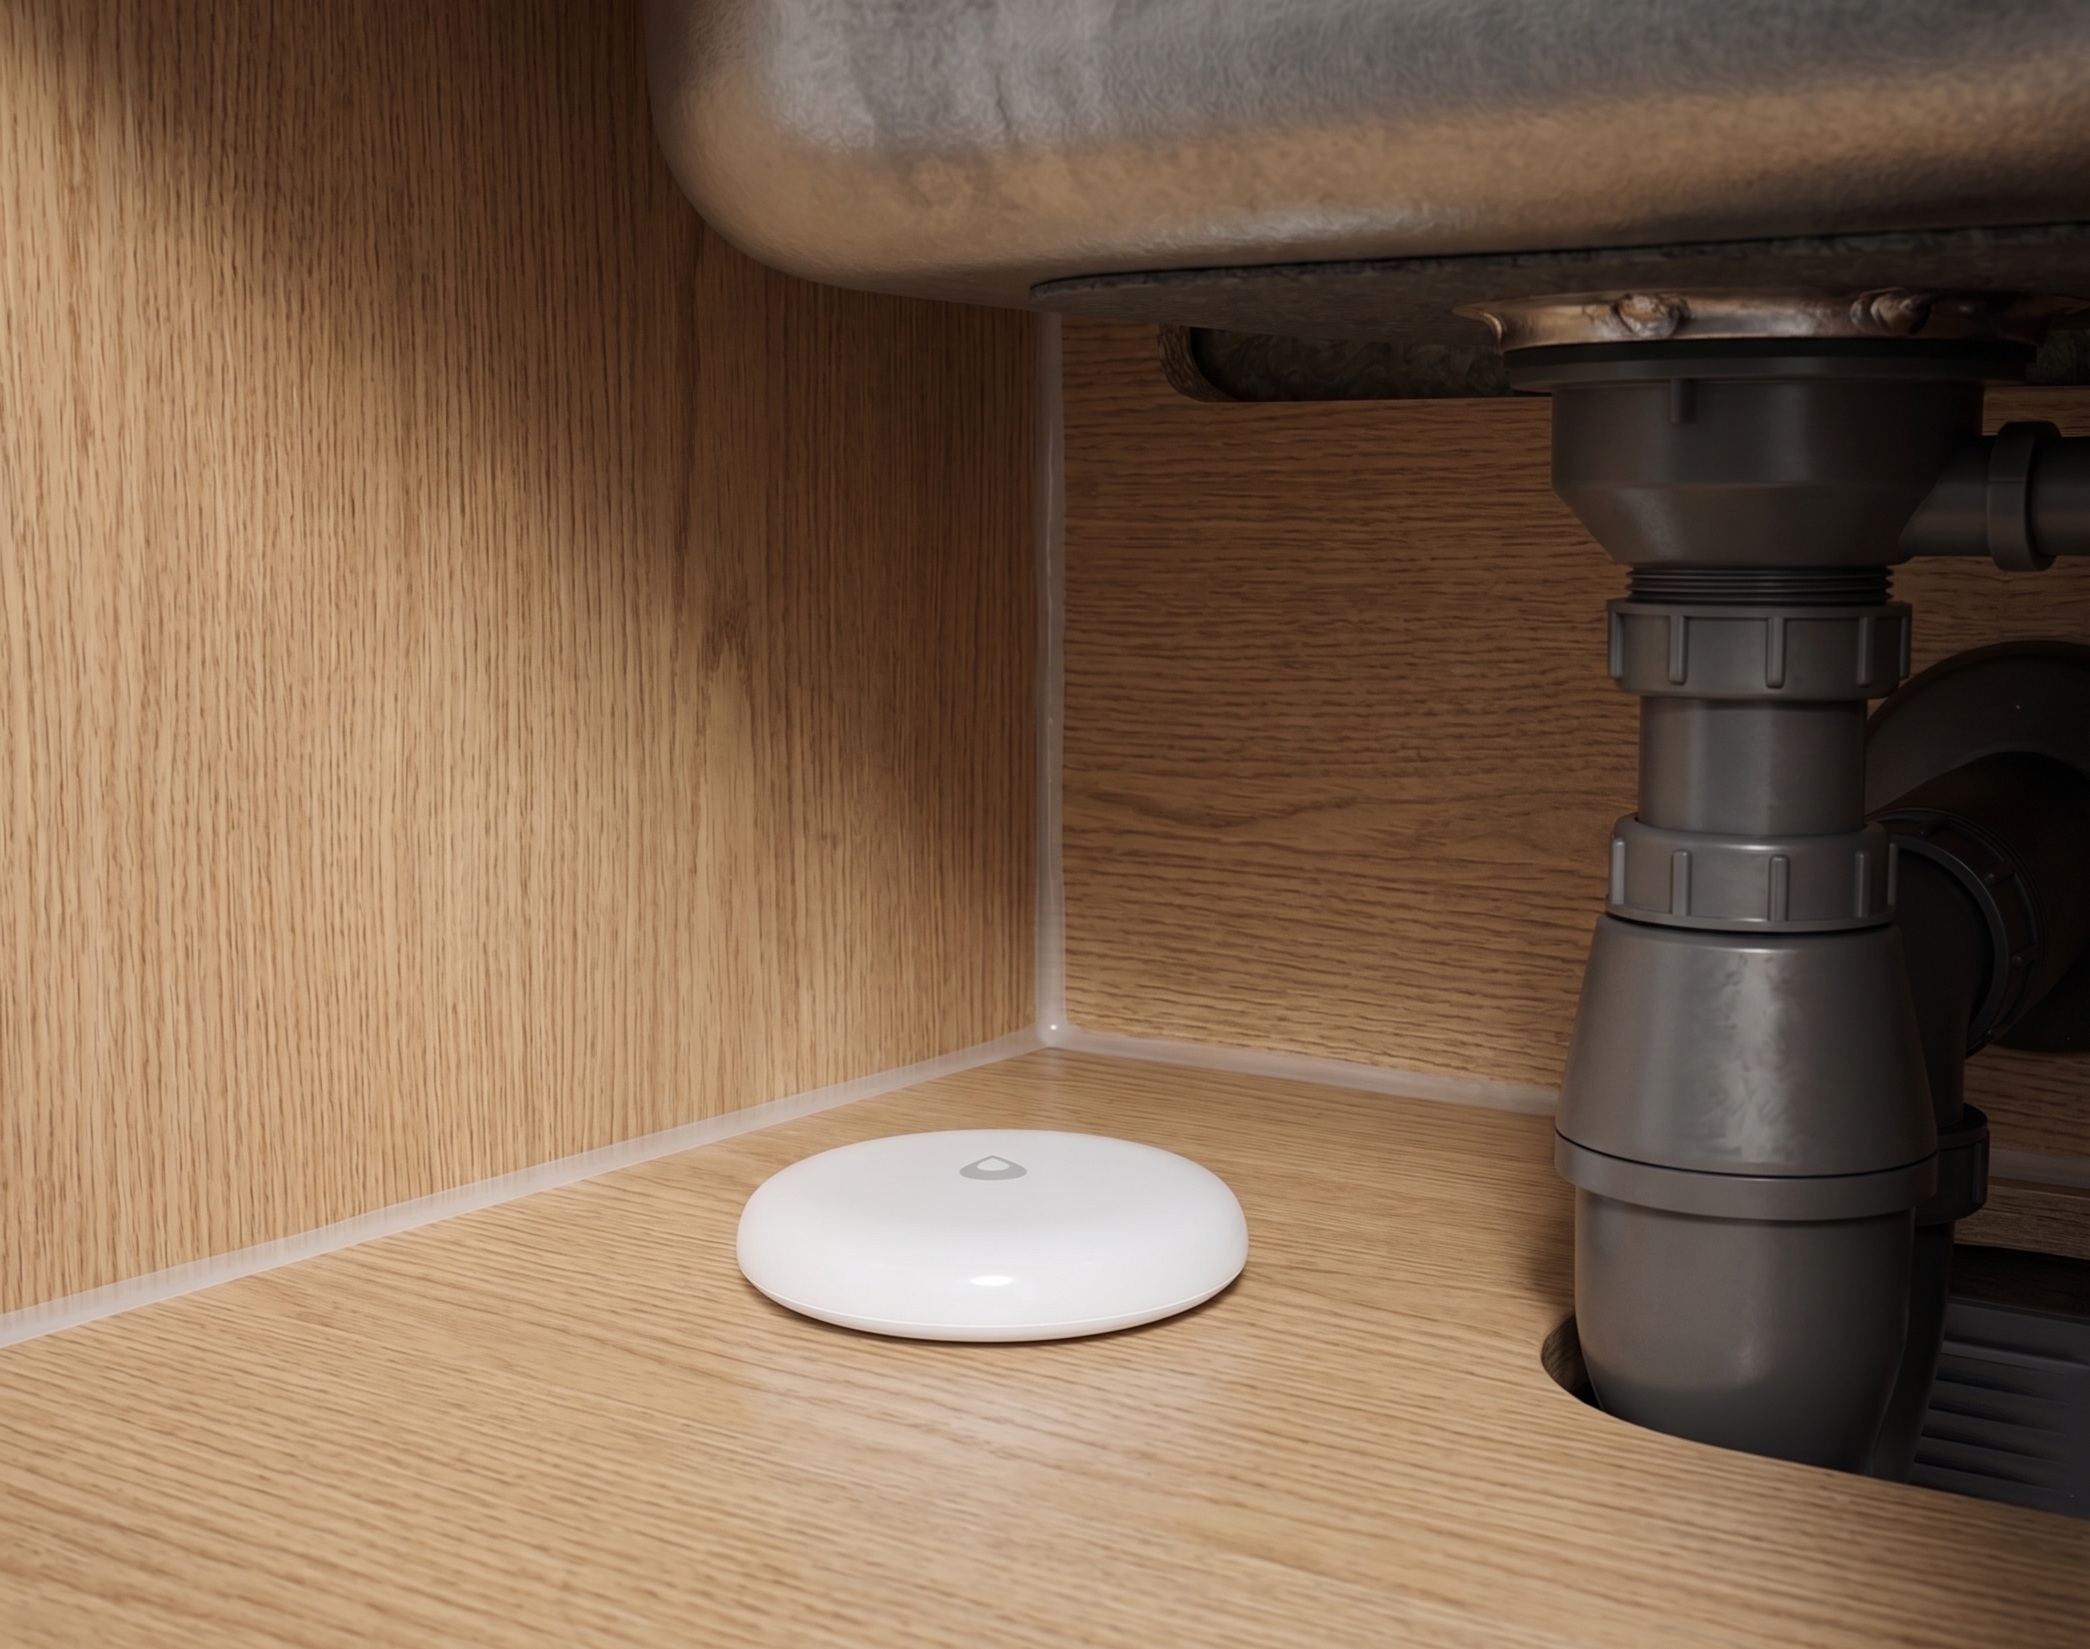
Placement
The sensor is a Zigbee end device, not a router — it consumes mesh capacity but doesn’t extend it. Place it within reasonable range of your coordinator or a mains-powered Zigbee router device (a smart plug, a Zigbee bulb, anything that stays powered and acts as a repeater).
Under a sink, near a washing machine, behind a water heater, or next to a dishwasher are the usual candidates. Basements with floor drains are another common placement.
The detection threshold is low enough that the sensor doesn’t need to be sitting in standing water to trigger. Flat placement on the floor near a potential leak source is sufficient — the probes on the base make contact with any thin film of water spreading across the floor.
One practical point: test the sensor before relying on it. Dip the base probes in a shallow dish of water and confirm the water_leak entity turns true in Home Assistant. This takes 30 seconds and rules out a silent pairing failure or a misconfigured automation before there’s an actual leak.
Troubleshooting
Sensor won’t pair — keeps failing mid-interview
This is the sleepy device problem. The sensor dozed off before the coordinator finished interviewing it. Start the permit-join window again, redo the 5-second hold to reset the sensor, and then tap the button once every two seconds until the Zigbee2MQTT log shows the interview is complete. Do not put the sensor down after the initial long press.
E1 (SJCGQ13LM) shows “unsupported manufacturer” error
This affected SJCGQ13LM units on older Zigbee2MQTT versions. The device reports its manufacturer as lumi.flood.acn001, and older Z2M builds didn’t have a converter for that identifier. The fix is updating Zigbee2MQTT to a version that includes the SJCGQ13LM converter. If you’re running Z2M via the Home Assistant add-on, the update is available through the Add-on Store. After updating, remove the device from Z2M and re-pair it.
Sensor drops off the network
Two common causes.
Weak mesh. The sensor is an end device. If it’s installed somewhere signal-challenged — under a metal sink cabinet, behind an appliance, in a basement — it may lose its parent node. Adding a mains-powered Zigbee router device nearby (a smart plug works well) usually solves this.
USB 3.0 interference. If your Zigbee coordinator is plugged directly into a USB 3.0 port, the port’s RF emissions can destabilize the coordinator’s signal. A USB 2.0 extension cable solves this. Worth checking before anything else if you’re seeing general Zigbee mesh instability.
Battery percentage isn’t showing after pairing
This is expected. Battery percentage can take up to 24 hours to appear after first pairing. The sensor reports battery state on its own schedule, not on demand. Give it time before concluding something is wrong.
The hub question, answered
All three Aqara water leak sensor models work without an Aqara hub when paired via Zigbee2MQTT. Five entities in Home Assistant, completely local, no Aqara cloud in the path.
The main pairing gotcha — keeping the device awake through the interview — is well-documented in the community and easy to handle once you know about it. Everything after that is standard Zigbee2MQTT operation.
If you want the Aqara hub path for other reasons (HomeKit integration, a centralized Aqara setup with other devices), our Aqara Hub M2 guide covers that. But for local-only Home Assistant alerts from a water sensor, the hub doesn’t belong in the picture.
Our temperature and humidity sensor guide covers the same Zigbee2MQTT workflow if you’re adding environmental sensors alongside the leak sensor — the pairing procedure is nearly identical.